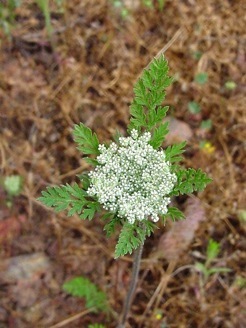
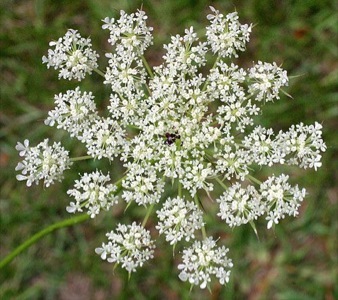
Wild Carrot, note the red spot in the middle

Daucus Carota & Pusillus: Edible Wild Carrots

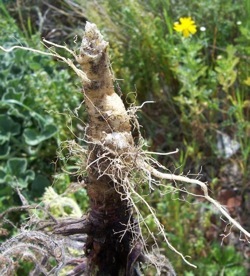
I’ve never understood the confusion over identifying the Wild Carrot also called Queen Anne’s Lace: It has a flat white blossom with a red spot in the middle, hairy stems and stalk, and the white root that smells like carrot. As the blossom ages it folds up looking like a bird’s nest. That seems quite easy to me, and was when I was a kid. Wild carrots were a common pasture plant. I tried eating more than one root raw, along with some dirt.  The key is to find them at the end of their first year before the roots grow woody their second year. However, often that woody part can be peeled off — as with wild mustard/radish — and the root made edible.

Dacus carota root

As straight forward as it seems some experts say the Wild Carrot only occasionally has a red flower in the middle. Really? I’ve never saw one without it when I was younger. That said, the above description is for the Daucus carota (DAW-kus ka-ROT-a) a wild carrot imported from the Old World and known everywhere in the United States as “Queen Anne’s Lace.” But, there was a native carrot in North America when the Pilgrims arrived, the Daucus pusillus (DAW-kus pew-SILL-us.) It does not have a red dot.

Dacus pusillus

D. pusillus is found in the southern half of the United States and up the west coast to British Columbia. Much smaller than the D. carota, its root are none the less edible, though that is not saying much. It tends to have flowers that are white to pink and white, again no red dot.  Like the import, the stems are hairy. The hairy stems and stalk is a very important identification element and separates the two carrots from very deadly members of the same family, such as Poison Hemlock which has a hairless stalk, that is often purple.

The Daucus carota is loosing some of its luster. A majority of states (at least 35 of them) list it as a pest or a noxious weed. It is particularly bad in Missouri. Apparently D. carota germinates easily and mowing doesn’t get rid of it. Some say the dried seed heads are a fire hazard and a threat to the honey industry. Another flower of the field demonized. My advice: Eat The Weeds! (See recipe on bottom)

Daucus pusillus, also called the American Wild Carrot and Rattlesnake Weed (I think nearly everything has been called Rattlesnake Weed or Indian Potato) is a simple to few-branched annual that grows to three feet tall but usually less.  The stems are covered with stiff hairs. The leaves are alternate, pinnate and compound on stems to six inches long.  The umbrella-arranged flowers have five white petals and five stamens.  It has fewer florets per cluster than the D. carota, 5 to 12, instead of 20. It likes dry ground, rocky to sandy soil, oak forests. Blooming time is April to June. The roots are similar to the D. carota, just smaller.

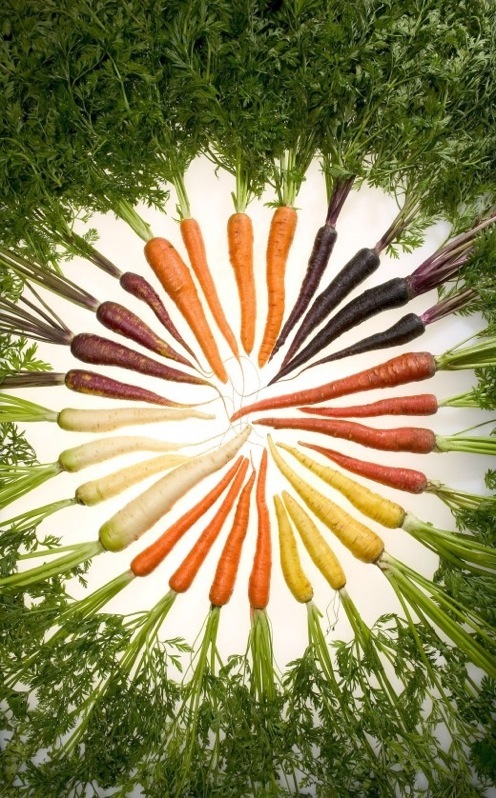
Cultivate carrots come in many colors

Unlike many native plants there’s not much evidence most Native Americans made much use of the D. pusillus. Eastern tribes ignored it, perhaps, records on them are scant. Only six western groups seem to have used it. The Nez Perce and Navajo ate the roots, boiled or raw. They also used it to ‘clean the blood,’ stop itching, treat fevers and treat snake bite. A decoction and or a chewed poultice was used to treat snake bite.  The Clallam, Cowichan, Saanich and coastal Salish also ate the root.

One way to get a steady source of good wild carrot roots is to grow them yourself. They sprout readily. Collect the seeds in the fall and set them out in the spring. Under cultivation they grow large, tender roots.  The root of Queen Anne’s Lace is likely a direct ancestor of the modern carrot which has been under cultivation for some 5,000 years, probably starting in Afghanistan. While the wild carrot root is cream colored to light orange there are a number of varieties including white, yellow, red, purple, green, black, striped and purple on the outside and orange inside. The orange carrot is believed to have been developed in the 16th century in Holland, where patriotic plant breeders developed it to celebrated the Royal House of Orange.

Incidentally, that cultivated carrot you bought or grew? The green tops are quite edible cooked. Add them to a variety of boiled dishes for flavor, or boil them separately and add them to other dishes as greenery.

The name Queen Anne’s Lace was adopted because Queen Anne of Great Britain was adept at making lace. They carried the allusion further by saying the red flower in the middle is when she pricked her finger and a drop of royal blood  fell on the flower.

Daucus is from the Greek word THAV-kon) meaning carrot parsnip and other similar food plants. Carota is from the Greek ka-ROW-ton, also meaning carrot is from the Indo European word Ker, meaning head or horn. Pusillus is Latin for tiny or puny.

Daucus plants can make cattle and horses “nervous.” The toxicity is consider mild. When I was a kid my mother told me wild carrot seeds were used for abortions.

Queen Anne’s Lace Jelly

18 Large Queen Anne’s lace heads

4 Cups water

1/4 Cup lemon juice (fresh or bottled)

1 Package powdered pectin

3 2/3 Cups

Bring water to boil. Remove from heat. Add flower heads (push them down into the water). Cover and steep 30 minutes. Strain.

Measure 3 Cups liquid into 4-6 quart pan. Add lemon juice and pectin. Bring to a rolling boil stirring constantly. Add sugar and stir constantly. Cook and stir until mixture comes to a rolling boil. Boil one minute longer, then remove from heat.

Skim. Pour into jars leaving 1/4″ head space. Process in hot water bath for 5 minutes. Makes about 6 jars.

Green Deane’s “Itemized” Plant Profile

IDENTIFICATION: Daucus carota: An erect, biennial herb; leaves basal and alternate, two-pinnately divided with narrow segments; flowers small, white, in a terminal, umbrella-shaped cluster;  20 florets, often with red spot in middle; seed small, dry, ribbed, with bristly hairs. Roots smell of carrots.

TIME OF YEAR: Roots in fall, blossoms in season

ENVIRONMENT: Full sun to partial shade, fields, pastures, meadows, rocky soil even clay.

METHOD OF PREPARATION: Roots cooked or if you have good teeth, raw.  Thin and stringy. The flower clusters can be french-fried for a carrot-flavored gourmet’s treat. Aromatic seeds good for flavoring soups and stews. Dried roasted roots can be are ground into a powder and used as a coffee substitute.


{ 35 comments }


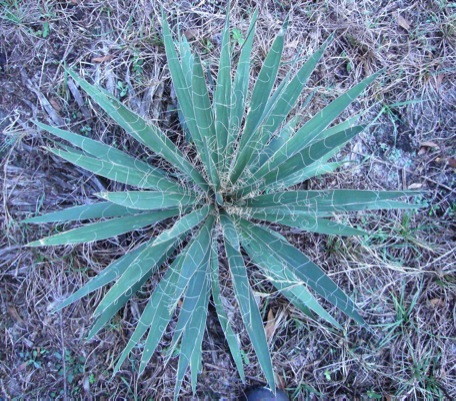
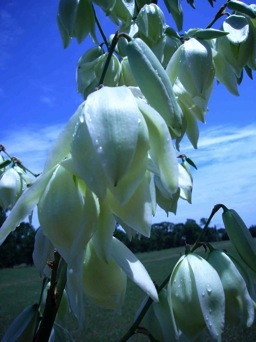
Yucca filamentosa leaves, great for cordage

Yucca, Yuca: Which is Edible?

When isn’t a yucca a yucca? When it is spelt with one “C” as in yuca.

What’s the difference? A belly ache, maybe more.

The yucca (YUK-ka) in the wild has several edible parts ABOVE ground. The yuca (YEW-ka)  in the grocery store is a cultivated cassava and has one edible part BELOW ground.

Yucca, two C’s, officially is native to the hot, dry parts of North and Central America and the West Indies.  However Y. filamentosa (fill-luh-men-TOE-suh) can be found as far west as Texas, north to Canada and east to Massachusetts. It is also found in humid Florida. So much for “dry”.  Other yucca, who do like it arid can be found across the desert southwest of the United States from Texas to California and parts south.

I’ve not met a yucca blossom I could eat raw

So, what parts of the yucca are edible? Flower petals, raw or cooked though raw they usually give me a stomach ache, at best throat ache.  Try your raw blossoms carefully. Try one — ONE — petal, not only blossom, one petal and wait 20 minutes. See if you throat feels dry or bitter. If so these flowers should be cooked, I recommend boiling. The young fruits raw or cooked, but they are very bitter raw, read another throat/stomach ache. They are far better roasted until tender. Scrape out the inside and separate from the seeds. The pulp, sweetened, can be use for pies or boiled dry to a paste, dry in oven as a sheet. Edible as is or mix with other food. The seeds can be roasted (375F) until dry, grind roughly, boil as a vegetable until tender. Young short flower stalks long before they blossom are also edible. Cut into sections, boil 30 minutes in plenty of water, peel. You can also peel first.

For you survivalists, the yucca provides more than food. Yucca wood — read the dry flower stalk  — has the lowest kindling temperature of any wood, desirable for fire starting, especially if you are using a bow and drill. Use the yucca stalk for the drill.  The roots and leaves can be rubbed in water to get a natural soap (that’s what makes the yucca bitter.) With some of the yuccas you can crush the root, and shampoo with the juice. Also the leaves can be made into extremely strong cordage. Many yucca come with a needle built in at the end of the leaf, and others like the filamentosa above, shed threads.

The Yucca is the state flower of New Mexico and is pollenated by a plant-specific moth…the nocturnal Yucca moth…

Sauteed Yucca Flowers with chipotle (or a chili of your choice.)

* 1/4 cup olive oil

* 1 Chipotle pepper in adobo sauce

* 1 clove minced garlic

* 1 diced onion

* 1 tomato

* One cup cooked Yucca flowers (boiled down from one quart fresh yucca flowers)

Salt to taste

Boil Yucca flowers in an abundance of water for about 10 minutes and drain well. Meanwhile heat the oil to medium heat, Sweat the onions and garlic then stir in everything except the flowers. Cook for about 5 minutes and keep stirring. Add flowers , stir until warm and mixed.

Green Deane’s “Itemized” Plant Profile

IDENTIFICATION: Erect plant with tall, thick central stem, 4 to 25 feet high, sometimes branched, long dagger-like leaves shedding threads, flowers tulip-like, waxy, drooping. Fruit cylindrical to 5 inches  with purple skin and pulp, many seeds

TIME OF YEAR: Blossoms in late spring, early summer, fruits later in the year in northern climes

ENVIRONMENT: Usually dry but not arid areas but some species like it arid

METHOD OF PREPARATION: Six-sided fruits edible raw or cooked, rubbery and bitter, cooking helps some, flower petals raw in salads, sparingly, or fried, may be batter dipped, boiled or roasted. Better boiled.  Very young flower stalk peeled and boiled. Roast seed, crush, boil until tender. Personally, I boil the  petals  for 10 minutes then use them. Occasionally I find a Y. filamentosa blossom I  can eat raw but only one. You simply have to try them carefully. They are sweet on first taste but leave a bitter residue.


{ 22 comments }

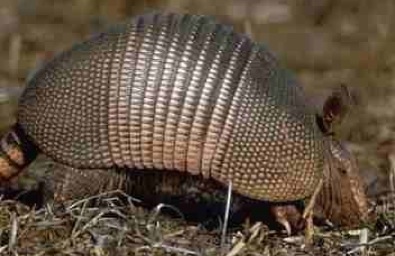
Armadillos have horrible eyesight

Armadillo Cuisine: Cooking a Hoover Hog

Armadillos are an overlooked food animal, not protected by law, available throughout the year, and good tasting. And they have been expanding their range, with some found as far north as northern Missouri and Oregon. There’s an armadillo near you.

That said let’s take care of a persistent rumor. A 2008 study almost put to rest the belief that you can get leprosy from eating armadillo. Of some 2500 armadillos caught and tested in Florida, none had leprosy. And for many years researchers were hard pressed to find someone in the United States with leprosy who had actually been in physical contact with armadillos in the United States. This changed in 2015 with several cases reported in Florida, some involving contact. However means of transmission are vague and 95% of people are resistant to leprosy. For years the position has been there is no correlation between hunting armadillos, cleaning them or eating them and having leprosy. In fact traveling to Mexico increased your chances of leprosy more than Armadillos did. Armadillos can occasionally have leprosy — the only other mammal that can get it — but thorough cooking would take care of the problem if it occurred. So there is a bit of a mystery and a bit of risk. The solution, if one is going to eat armadillo, is to take precautions cleaning said and cooking thoroughly.

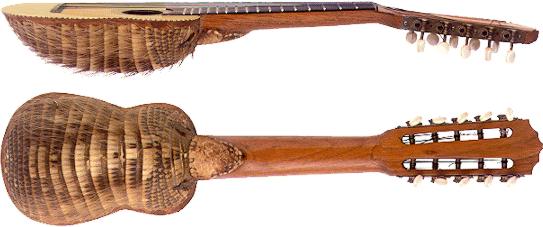
Charango, a ukulele-like instrument is tradtionally made fro an armadillo shell.

Charango, a ukulele-like instrument is tradtionally made fro an armadillo shell.

Armadillos eat the little invertebrates that live just under the leaf litter of shady forests. On their list of favorites are earth worms, grubs, beetle larvae, mole crickets, army worms, termites, yellow jackets, cockroaches, wasps, flies, grasshoppers, ant larvae and, for some reason, they also love egg shells. They have 40 peg-like teeth in the back of the mouth — read they can’t bite you — and pig-like snout  digging out wiggly delectables. Stay away from their claws, however. Those can hurt.  It’s been estimated that one armadillo can eat up to 40,000 ants in one meal. That’s four pounds of bugs a week, or 200 pounds each year. The entire population of North American armadillos is estimated to eat more than six billion pounds of insects per year. They’re good to have around.

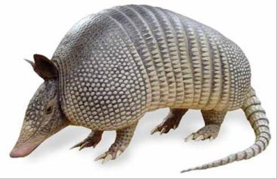
There are 20 species of armadillos, including the three, six, and nine-banded armadillos. They’re named for the number of bands in their armor. The nine-banded armadillo (which has six species) is the only one to range into the United States. The nine-banded armadillos were first reported in the United States in 1849 (not 1949 as some copycat sites say.)  John James Audubon, who was known more in his day as a hunter than a naturalist, noted them in Texas in 1854. For more on Audubon, see Geiger Tree.

The nine-banded armadillo mates — missionary style — as early as July and as late as December and gives birth during the months of March and April, when not stressed or when climate conditions are at there best. They give birth to four identical young, quadruplets of the same sex . Full size they weight 8 to 17 pounds. Armadillos are prolific and there is an estimated 50 million of them in the United States. Fire up the barbie! The Nine-banded Armadillo is also the most numerous armadillo. They’re known by a variety of local names. Armado in Guatemala and Panama. Cachicamo in Venezuela, Carachupa in Peru, Cusuco in Costa Rica, Kapasi in Suriname, , in Argentina, and Tatu Galinha in Brazil.

What their scientific name, Dasypus novemcinctus ( DAS-ih-puhs noh-VEM-sink-tuhs) means is a bit of a nonsensical dispute. Dasypus novemcinctus literally means “hairy foot nine girdle.”  That’s the interpretation if one thinks “Dasypus” is two Greek words put together meaning hairy foot. Dasis does mean hairy or bushy. Pous is a common term for foot.  The other view is that it came from an Ancient Greek word for rabbit “dasypodis.” I suspect both are right, that dasypodis meant rabbit and also hairy foot.  More to the point, the Aztecs called the the armadillo Azotochtli, or “turtle rabbit.” so when it was being named by Carl Linnaeus there was an effort to keep “rabbit” in the reference. More so, without their shell the armadillo resembles a rabbit but tastes more like fine-grained, high-quality pork.

The US population of armadillos had its start in two places. First it moved into Texas from Mexico and about a century later crossed the Mississippi. At the same time, armadillos became roadside attractions in Florida. Their unintentional liberation started a Florida group. Around the 1970s the separate populations met and merged in the Florida panhandle. Generally said armadillos are most abundant within 100 miles of the Atlantic or Gulf of Mexico but are found throughout the South north to Nebraska and Missouri.

Florida Crackers have been enjoying fried armadillo for more than 100 years. The easy-to-catch animals provided meat for many a pioneer household. They got the nicknames  “possum on the half-shell” and later during the Great Depression they were called “Hoover Hogs.” At the time President Hoover was promising a “chicken in every pot” but people were so poor all they could eat was what they could catch, including armadillo. Many people parboil the meat and trim off all fat, which gets rid of any wild game taste. Then they fry it but that is not necessary. It can be used as is in stews and the like.

Armadillos typically rest in a deep burrow during the day and become more active during the late evening, night, or early morning. These burrows are usually located under brush piles, stumps, rock piles, dense brush, or concrete patios, and are about 7-8 inches in diameter and can be up to 15 feet long. There are several live-trapping techniques that can be used to capture armadillos when they come out of their burrows. One is to firmly insert a 6-inch diameter PVC pipe into the entrance of an active burrow. Regular-sized armadillos will get stuck in the pipe as they try to exit. A nylon throw-net used for fishing can also be staked down so it covers the burrow entrance. Armadillos will get tangled in the net as they emerge. Another trapping technique involves burying a large bucket (larger than five gallons) in front of the entrance, and covering it with newspaper or plastic sheeting and a light layer of soil. Their eyesight is so poor they fall into it.

Armadillos can also be trapped in raccoon-sized, metal, cage live traps or in homemade box traps. Traps should be located near the entrance of burrows or along fences or other barriers where they might travel. This trap is most effective when “wings” (1 x 6 inch x 6 feet boards or other material) are added to funnel the animal into the trap. Suggested baits are live earthworms or mealworms placed in hanging bags made of old nylon stockings. Other suggested baits are overripe or spoiled fruit. Armadillos are more likely to enter a cage trap when leaf litter or soil is placed over the bottom. Because armadillos are nocturnal, all trapping techniques designed to capture armadillos emerging from burrows should be applied late in the afternoon and checked several hours after darkness.

Besides poor eyesight Armadillos also have poor hearing. They do however, have a keen sense of smell, so get thee downwind. They like dense shady cover,  such as brush, woodland or pine forests. The texture of the soil is also important. They prefer sandy or loam soils that are relatively easy to rummage through.  Compared to other common mammals such as raccoon and opossum, armadillos are remarkably free of parasites. Rabies has never been diagnosed in armadillos in Florida.

Armadillos are one of the most common victims of highway mortality in Florida. The armadillo’s instinctive response of jumping upwards three or four feet when startled may be effective at avoiding a lunging predator, but not an automobile or truck passing overhead. As long as there are highways it makes one wonder if that trait will be bred out.

Shooting is another method frequently used to control or obtain armadillos. Recommended firearms are a shotgun with No. 4 to BB-sized shot or .22 or other small caliber rifle. It is illegal in most places to use artificial lights to aid in the shooting of armadillos at night.

You should skin and dress an armadillo as soon as possible. The easiest method is to skin from the underside to split the skin from the neck most the way down to the tail, best be careful not to puncture the abdominal cavity. You’ll need a sharp knife. Peel the animal out as you would a squirrel or rabbit. Remove all fat from under the front and back legs and wash meat thoroughly. After meat is cleaned completely, cut into quarters. It is recommended you wear gloves and a mask while cleaning the animal. It is estimated 15 to 20% of armadillos carry  the leprosy bacteria. The disease can take years to manifest itself, first symptoms is usually a skin rash. Some cases of leprosy have been misdiagnosed as Lyme’s disease. The antibiotics used to treat Lyme Disease does not affect Leprosy bacteria.

In some South American countries they cook the armadillo in the shell on the grill (after gutting it) split side down. It is then eaten out of the shell.  One can do the same thing near an open camp fire getting rid of the need for pots or pans.

On You Tube my video #70 at the end shows how close one can get to an armadillo.

*A large statistical analysis infers some Armadillos must of had leprosy but an actual animal with it is difficult to find in U.S. And people in the United States who get leprosy usually have in connection with travel and armadillos in Mexico. That said contact with Armadillos in central Florida are increasing. 

BAKED ARMADILLO

1 armadillo (or more), removed from shell (reserve to make a musical instrument.)

Salt

Pepper

Chunks of apple & pineapple (about 1 1/2 c. each)

1/2 c. butter

An armadillo produces a lot of meat. The smaller ones are best for frying; the older ones need to be cooked slowly for a long time to ensure tenderness. After cutting carcass out of the shell, thoroughly wash meat. Salt and pepper armadillo. Stuff with chunks of apple and pineapple. Coat with butter and wrap in foil and place in roasting pan. Bake in a 325 degree oven until internal temperature reaches 180 degrees. Allow 30-45 minutes per pound. Allow 1/3 pound of meat per serving.

 ARMADILLO FRICASSEE 

1 armadillo, cut into pieces

2 med. potatoes

2 onions, sliced

2 carrots, coin chopped

1 stalk celery, chopped

1 bay leaf

1/4 tsp. thyme

1/2 c. butter

1/2 c. flour

1/2 tsp. salt

1/4 tsp. pepper

Dust armadillo meat in flour, salt, and pepper. Brown on both sides in the butter. Put enough water in pot to cover after adding remaining vegetables. Cover and simmer until meat is tender, about 2 hours. Add seasoned flour and water to thicken liquid.

Armadillo Chili

3 1/2 to 4 lbs.  armadillo cut into 1/4 inch cubes

2 c. diced onion

3 cloves garlic, minced

1/2 tsp. black pepper

1/4 c. vegetable oil

28 oz. crushed tomatoes

1 3/4 c. water or beer

1 dried milk red chili pod

1/2 tsp. oregano

1 tbsp. liquid smoke and/or 2 tsp. masa harina (optional)

2 med. green bell peppers, diced

2 tsp. salt

1 tbsp. sugar

28 oz. can tomatoes

12 oz. tomato paste

1 tsp. ground cumin

Cut and remove stem and most of the seeds from chili pod. Tear pod up into small pieces. Then place in heavy pan and toast over medium low heat till crisp. Let cool. Crumble or crush into powder. Put oil in 5 quart or larger heavy pan, heat to medium high, add meat 1/3 at a time and brown. Remove meat as it browns Stir onions, peppers, garlic and powdered chili into hot oil. Continue cooking and stirring until tender. Add remaining ingredients, stir. Return browned meat to pan, continue stirring until mixture begins to boil. Reduce heat to low. Cover and simmer 1 hour. Stir often or till meat is tender. Pour into serving bowls, add hot chili sauce or hot salsa to suit taste. Garnish with shredded Monterey Jack or cheddar cheese and chopped onion. Note: May substitute chili pod. ground cumin and oregano with 4 teaspoons commercially prepared chili powder. May add more water and/or tomato sauce while preparing, if you prefer soupier.

FRIED ARMADILLO

Place serving size pieces in a stew pot with a little water and gently boil until meat is tender, about 1/2 hour. Remove meat and cool; roll in flour with salt and pepper. Put in skillet of hot cooking oil. Brown on both sides. Cover skillet and cook 20 to 30 minutes. Add chicken broth, if needed.

 ARMADILLO AND ONIONS 

1 armadillo

11/2 tsp. salt

1/4 tsp. paprika

1/2 c. flour

3 tbsp. fat

3 lg. onions, sliced

1 c. sour cream

Soak meat overnight in salted water (1 tablespoon salt to 1 quart water). Drain, disjoint and cut up. Season with 1 teaspoon salt, paprika, roll into flour and fry in fat until browned. Cover meat with onion, sprinkle onions with 1/2 teaspoon salt. Pour in the cream. Cover skillet tightly and simmer for 1 hour.

 ARMADILLO MEATLOAF 

11/2 lbs. ground meat

2 eggs, beaten

1/8 c. dry crumbs

1 c. evaporated milk

1/4 onion, minced or grated

1/4 tsp. thyme

1 tsp. salt

1/4 tsp. pepper

1 tsp. Worcestershire sauce

Soak meat overnight in salted water (1 tablespoon salt to 1 quart water). Remove meat from bones and grind. Mix thoroughly with other ingredients. Place in meat loaf dish. Place dish in pan containing hot water. Bake in a moderate oven, 350 degrees for 11/4 hours to 2 hours.

MARINADE MEAT SAUCE Combine all marinade ingredients, stirring well. Prepare armadillo meat by cleaning and cutting into serving pieces. Marinate for 24 hours. Remove from solution and allow to drain for 30 minutes before cooking. In a heavy black iron pot, brown sausage and armadillo in hot oil, permitting meat to stick to bottom of pot just a little for extra flavor. Remove armadillo from pot and set aside leaving sausage in pot. Add onions, green pepper, garlic and celery; stir continuously, cooking until tender. Add steak sauce, pick-a-peppa sauce, salt, pepper, MSG, and Worcestershire sauce; mix well. Add armadillo and water. Heat to boiling; reduce heat and simmer for 10 minutes. Reduce to low heat and cover with tight lid. Cook until tender. (Do not stir but take pot by handle and half-spin from left to right every 10 minutes). Add mushrooms and wine; blend gently with a spoon. Sprinkle with parsley and lay thin lemon slices on top. Simmer uncovered for 15 minutes. Serve over rice.

Sloppy Joes for 50

8 lbs. ground armadillo

1 c. chopped onion

1 c. chopped celery

1 c. chopped, cored & peeled apple

2 qts. tomato sauce

1/2 c. brown sugar

2 tbsp. mustard

1/2 c. vinegar

Brown meat, celery, onion and apples with 1/4 cup vegetable oil. Combine ingredients for sauce and simmer for 15 minutes. Add sauce to meat, onion, celery and apple mixture. Serve with big buns. Plan to make this 1 day before you need it served because it always tastes better as a leftover (this will also allow the opportunity to upgrade your road kill!)


{ 28 comments }

Jellyfish


Stomolophus meleagris: Edible Jellyfish

“Music to the teeth” is what the Malaysians call them.

Americans may not eat jellyfish, but the rest of the world does, several hundred metric tons a year at around $20 a pound. It’s a many million-dollar business. And at least two or three of those drifting edibles are found off almost all the shores of America, one of them in pest numbers in Florida waters and the Gulf Coast.  I don’t go looking for the creatures but when they turn up in my castnet they comes home with the rest of the catch. The catch, however, is that jellyfish have to be processed over then next several days to make them edible.

Actually there are several methods to “cure” the jellyfish all involve drying while retaining color and firmness. In fact, there are Jellyfish Masters like wine masters. The curing process is as much an art form as a science. Traditional methods can take more than a month. Express techniques three days. The at-home compromise is about a week. It’s not complicated. It just takes… some time. It also helps if you like to eat jellyfish.

I can remember the first time I had jellyfish in a restaurant. It was more than 40 years ago. I had a Taiwanese friend and we went out to dinner often. That’s when I first learned that nearly every authentic Asian restaurant has two menus, one for the Americans and one for the native crowd, and they don’t have the same selections. To this day I still order a particular salt-fried shrimp that is never on the main menu. My friend always had the custom of ordering three dishes for the two of us. And one day for the third dish she ordered jellyfish salad. It was delicious and crunchy and I was hooked.

There are actually several edible jellyfish, all processed the same way as far as I know. The most common one is the Cannonball Jellyfish, or Stomolophus meleagris (sto-moe-LOAF-us mel-EE-uh-gris) which in Dead Latin-mangled Greek means “speckled crested mouth.”  Several copy-cat web sites say it means  “many-mouthed hunter”  which is quite absurd. Stoma in Greek means mouth. Lophos in Greek means crest. Meleagris in Greek literally means black and silver but in use means speckled. It is also the Greek name for the guinea fowl. I have no idea how “speckled crested mouth” got perverted into “many-mouthed hunter.”

For a creature few Americans outside of US shrimpers know about, the Cannonball has generated a lot of talk, research, anger and debt —  no deaths that I know of (I had to mention that.) Found from Maine to Brazil, and from Southern California south on the west coast, it is a pest from about the latitude of North Carolina south. In certain months they can make up 16% of the biomass in shallow near-shore waters and estuaries, the latter a favorite haunt. Sometimes in the spring and fall there are so many Cannonballs in shrimp nets that the haul is too heavy to pull on board and the entire catch has to be dumped. On the other side of the issue, there have been attempts to harvest that very same jellyfish and make it into a commercial product, if only for shipping to the Orient where our domestic product is better than their native product. That, too, has gone bust and emptied a few wallets.

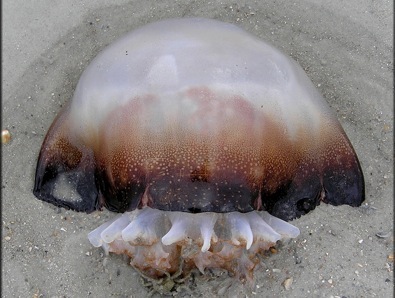
While found in the warmer months in northern latitudes they are a common species in late spring and early summer, particularly around the Gulf Coast, Florida and the Caribbean. During this time they often litter the coast. If you find them on shore leave them there. Get your catch while still alive and in the water. It is dense, rigid and holds it shape even out of water. They are good swimmers and can have a bell diameter up to 9 inches through. These jellyfish don’t have tentacles per se but they do have 16 fused arms that push food towards what is its mouth/anus (these are simple creatures.)  The bell can vary in color from bluish to yellowish and they are typically darker around the bottom edge.

The Cannonball has a mild if not unnoticeable sting that is usually harmless. However, some folks are allergic to it and for them it can be problematic so best avoid being stung. It has toxins that can cause cardiac problems and is also harmful to the eyes, so handle it with care. For the rare individual who is allergic to it, they should also not eat it.

Jellyfish (which really aren’t fish but relatives of coral and sea anemones) have to be processed soon after catching. No more than six hours is a good rule, immediately is better. They can be kept in seawater or put on ice. First you remove the trailing parts (if it were a mushroom, the stem.)  That leaves you with the round part, the umbrella which has three layers, the exumbrella or the upper surface, the subumbrella or inner surface, and in between them the mesoglea (which means gelatin dessert.) The umbrella is scraped to get rid of any mucus then washed. Both parts are used and can be processed at the same time but commercially the perfectly preserved globe part — flattened to a pancake — is choice.

Don’t exceed a gallon of jellyfish per gallon of water, a roughly one to one ratio. In the first phase in a two gallon container soak the parts in a brine that is 7.5% salt and 2.55% alum which if working with a gallon is 11.25 ounces (315 grams) of salt added to the gallon of water and almost four ounces (107 grams) of alum added to the same gallon.  Soak them two or three days, then transfer to a second solution. This is a brine of 15% salt and 1% of alum, or 22 ounces (615 grams) of salt to a gallon of water, and 1.5 ounces (42 grams) of alum to a gallon. Soak them again for two or three days. Here methods vary. As expected the salt draws moisture out of the flesh, as does alum which also adds crispness. There is a reasonable concern that the alum adds aluminium to the flesh. Calcium citrate can be used in place of alum if the amount of aluminium is dietary concern

In part three you can take them out of the brine, dry them, coat them with salt and let them dry for several days, turning often. You can also add weights to flatten them. Alternatively, you can put them in a third brine of 25% salt, or about 2.75 pounds of salt to a gallon and let them set for seven days. Then drained, dry and salt. The jellyfish are piled up to a foot high, one on top of another, and seven to eight pounds put on top for about three days. This flattens them like a pancake. They they are bagged and stored.

The final product is mild in flavor and light yellow to clear in color. To prepare for use the cured jellyfish are soaked in lots of water for several hours, over night is best, then cut into strips and scalded. Then they are used, often as a cold plate with a dressing soy sauce, vinegar, sugar, and sesame oil. They can also be cooked with other meat and vegetables.

A third curing method if you are really in a hurry is soak them in 15% salt and 10% alum for 48 hours… ( 22.5 ounces salt,  one pound of alum per gallon) wash, drain for two hours, dry at 30C/86F for 9 to 12 hours in a mechanical dryer. If you want a bigger curing formula you would treat 132 pounds of Cannonball jellyfish with 81.5  pounds of salt, 6.5 pounds of alum.  Then adjust the first recipe accordingly after that, 163 pounds of salt and about three pounds of alum. Ideally you have a one to one ratio of water and jellyfish, or less jellyfish but not more. A fourth method is simply putting them in rock salt for a few days. I don’t know much about that one but it sounds interesting.

According to a 2001 study a desalted Cannonball is about 95% water and 4 to 5% protein. It is very low in calories and mostly collagen. For four ounces the nutritional values are 30 calories, none from fat; 120 mg of sodium and eight grams of protein. What does it taste like? Bubble wrap with dressing. For over 1,700 years, Asians have been eating jellyfish for medicinal reasons to treat high blood pressure, arthritis, bronchitis and reportedly to prevent cancer. By the way, the Cannonball collagen has suppressed induced arthritis in laboratory rats. In fact Auburn University holds a patent on an arthritis treatment involving jellyfish collagen.

Among the edible jellyfish are Aurelia aurita, Catostylus mosaicus, Cephae cephea, Crambione mastigophora, Crambionella orsini, Dactylometra pacifica, Lobonema smithi, Lobonemoides gracilis,Nemopilema nomurai,  Rhopilema esculentum, Rhopilema hispidum, Rhopilema verrilli,  Rhizostoma pulmo, Stomolophus meleagris and Stomolophus nomurai. The Rhopilema verrilli is also found in the Atlanta on America’s east coasts. And I well remember as a kid watching Aurelia aurita off the coast of Maine, never guessing it was edible.

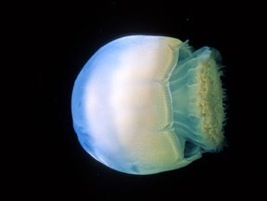
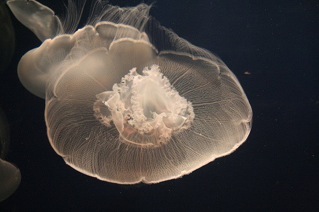
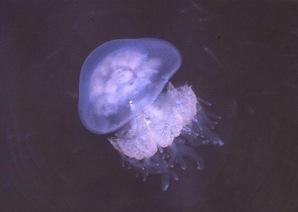
There are actually two variations of Cannonball Jellyfish in local waters. On the Atlantic side is the kind with a brown rim around it, picture above. It is also called the ruby-lipped cannonball. The ones found in the gulf coast are whiter — snow white Gulf Balls, pictured below. The latter are the preferred ones for market. There is no taste difference, just customer preference in Japan and Korea… think white chicken eggs/brown chicken eggs kind of thing. Apparently the environment would be better off, too, if we ate more Cannonball jellyfish. They are veracious predators eating plankton, fish eggs and larvae. So if their population is reduced we’d probably have more fish.

Are the toxic jellyfish? Absolutely. The sea wasp– Chironex fleckeri — of northern Australia can kill you in three minutes. It has enough toxin to kill 60 at a whack. Locally, Portuguese Man o’ War can make your day miserable.  Avoid any jellyfish with long tentacles.

Aurelia aurita

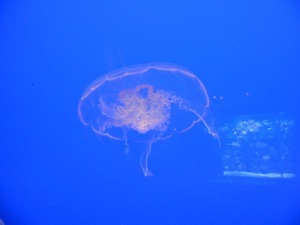
Rhopilema verrilli


{ 19 comments }

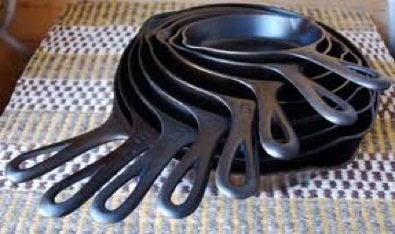
Black cast iron pans are green because they last so long. Photo by Green Deane

Cast Iron Pans: Yesterday is tomorrow

Many books have been written about cast iron cookware. I will try to say a few things here perhaps not said elsewhere. I have a video here

Buying
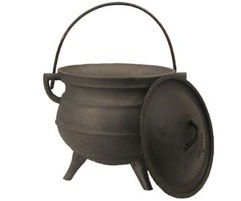
Cauldron with legs and lid for large jobs

I rarely buy new cast iron, for several reasons. First, I find most of what I want at garage sales and flea markets. Friends and hand-me-downs also count. More so, older cast iron pans are usually made of better iron. They are surprisingly lighter, have a finer grain making them smoother to start with, and heat more evenly than newer pans. Unfortunately there is now only one manufacturer of cast iron ware in the Unites States and while adequate their products are not superior. Functional would be more accurate.
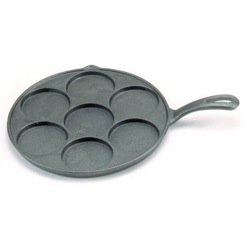
Potato cake or Pan cake pan

What pieces should you buy? While you can see a larger assortment below there is no argument that a very large frying pan is the kitchen workhorse. Following that is a large dutch oven with lid. You can cook nearly anything with those two and only those two pans. Other pans are nice but not necessary. And if you could only have one pan, pick the large dutch oven which can also be used as a frying pan. While I have hundreds of cast iron pans if I could take only one with me in some emergency it would be a large dutch oven. However, in modern times with an intact society I use the frying pan the most. If society fell apart it would be the dutch oven.
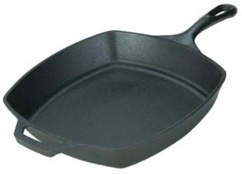
Square skillet

Other pans are nice to have, among them a roasting pan, grill pan, and muffin pans. Indeed, my mother who is 88 is still using the cast iron muffin pans she had when I was a kid that she got from her mother. Not only is that family history but low cost and environmentally reasonable in that you are not buying new pans every few years.
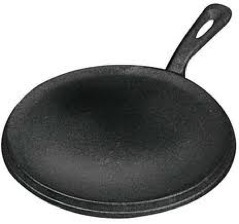
Pancake griddle

Old and New

First you want a pan that sits flat on a flat surface. No wobble. A wobble means it is warped and will heat very unevenly on a flat surface (however, if the pan is to be used only on a camp fire and is dirt cheap, the wobble can be overlooked.) Next you want a pan with as smooth a cooking surface as possible. Big pits cannot be restored and food sticks to them. (Again, if you only going to heat water in a pot, the pits are no problem. )
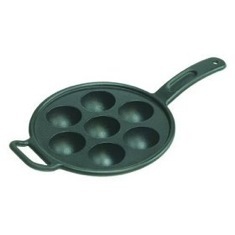
Swedish Aebleskive Pan

You want a pan that rings well when hit (see my video on said.) If you hear a buzz — read there’s a crack — or no resonance — thin metal — you don’t want it. You want a solid pan with some weight to it. No lightweights allowed.

Small frying pans are cute, and can be spoon rests, but I’ve never found any practical use for them nor cookie pans of different design, but then again I am a lifelong bachelor with no one to cook cookies for.
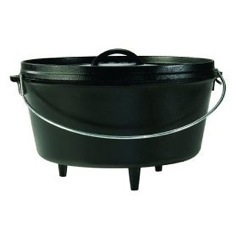
Camp oven, with legs and flat lid with edge for holding coals.

Unfortunately cast iron pans that used to be dirt cheap are now hot items and command very high prices. A complete Griswold dutch oven with lid and trivet can run $200. To get around that one can find them in toto or in parts at recycle centers and restore them. Complete sets command high prices but you can put sets together by piece meal if you exercise some patients. Also, anytime anyone wants to get rid of a cast iron pan speak up for it. Many people don’t understand cast iron so they don’t use it and often just give it away. Take it. It might be a collectable, can expand your collection, or, you can gift it to someone else if you don’t want it. I often pick up junked pans, clean them up, and give them away.
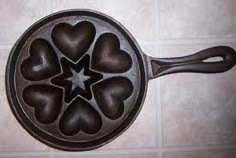
Cookie pan

Griswold was bought by Wagner who also made good pans, but not as sought after as Griswold. Griswold are the collectables. Now only Lodge makes cast iron pans in the United States. While there is nothing wrong with Lodge pans I do not prefer them for several reasons. They are no doubt well-made and the value good. I do own a few. Yet they are heavy and large grain iron which I think requires more work to season. But I certainly prefer them over many foreign brands.
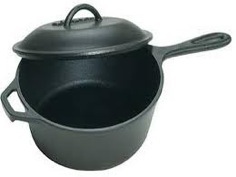
Two quart sauce pan with lid

When it comes to cast iron pans made in China and the like the quality can vary greatly from extremely poor to useable. Poor pans will have casting marks and often sharp edges that weren’t ground off. They often have a brown tint — not rust — to them and are often very grainy.

There is nothing wrong with a no-name cast iron pan as long as it is well made. The exterior iron will look smooth, the cooking surface will be even smoother. It will be black or gray, not brown (excluding rust.) Some Asian pans have a milled cooking surface with circular scoring. They are light weight and work reasonably well. Don’t pay a lot for them, however.  On the other hand, if you are truly particular you can even custom order cast iron pans from a Canadian family-owned company.
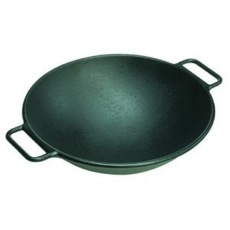
Two handled wok

You can also buy cast iron pans from Europe that are enameled on the outside. Very expensive, chip easily. They are good pans but way over priced. The only cast iron that is enameled that you might consider are Japanese tea pots which are coated on the inside to keep down rust.

One pot not to buy – see below — is a humidifier that was made to look like a tea pot. It’s a disgusting deception. They hold a couple quarts of water and have a cheap lid on a pivot. They are very heavy, have an oversize spout, and are unmilled inside. They are not made for making hot water. They are humidifiers made of poor iron often with toxic impurities. Real cast iron tea pots are small, well designed, smooth inside, not large or bulky. These knock-offs are often sold for about $20/$30 in antique malls.  If you really want a cast iron tea pot, consider several Japanese models.
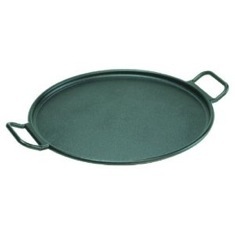
Pizza pan or pancake griddle

There’s a  huge array of cast iron pans, standard and custom. But there are some general things to look for.

Pans with a raised ring on the bottom were made to use on a wood or coal stove with removable lids. One would take the lid off the stove and put the pan in its place, exposing the bottom of the pan to the fire. These don’t work as well as flat bottom pans on electric stoves.  Also, while pans are numbered et cetera numbers and size do not have to agree. A #8 pan can be 8.5 inches or even 10 inches.
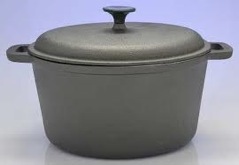
Dutch over, no legs, rounded lid

Dutch ovens are large pots with lids and a flat bottom, made for stoves and ovens. Camp ovens, same size, have short legs to hold them above fire coals. They also have lids with rims to hold hot coals on top for even cooking, particularly of breads and the like. Older pans often have lids that double as frying pans. A lot of veteran campers don’t like camp ovens because a leg can get knocked off then you have to knock off the others and sand the stubs smooth.

Waffle pan

Numerous muffin pans were made. You will probably find many shaped like small ears of corn. Season those carefully because they are a little harder to clean than usual.  Half a log muffin pans are usually older than doubles. There are also some nice french bread loaf pans from China that work well.

Harder to find but worth the effort I think are pans with a bail. In the winer months I do a lot of cooking with my fireplace and the bail with a wall-mounted swing arm is very handy.  These pans are also useful over camp fires and the like. Many bailed pots are also rounded on the bottom for use as soup pots or stew pots.
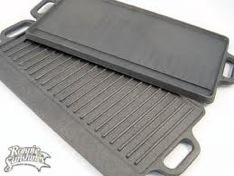
Two sided griddle

Also look for extra handles and pouring spouts particularly on frying pans. It makes using them much easier to use, especially for those for whom heavy pans require two hands. Dutch ovens with extra handles and spouts are nice but not necessary. Conversely, do not by any pans with wooden handles. Such handles limit their use. You can’t put wooden handled pans  in the oven, which is often done with cast iron. You also can’t use them over an open fire. The handles will burn off. You can use a pot holder on the handles or pick up inexpensive handle covers for the pans.

Some pans sold through regional foundries have dimples on the outside. It’s a clue to their identity and does not affect their function.

Restoring and Cleaning
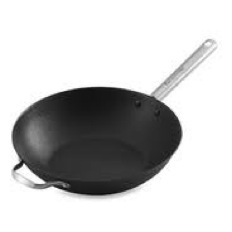
Light wok

There are several ways to clean cast iron. Unfortunately too many people are just too macho about it.  Before the Age of Enlightenment folks just tossed a pan into a roaring fire. That will burn off rust and crud but it can also warp the pan and damage the surface making it worthless. It is a sledge hammer approach and just not necessary.

Lye-based oven cleaners work but involves harsh chemicals. You put the pan and the cleaner in a plastic bag and set it in the sun for a few days. They are dangerous, rough on the pan, not to nice for the environment and costly. A pan is not an oven.
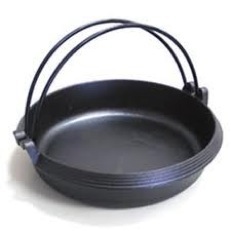
Two-bail Japanese Frying Pan

Soaking the pan in vinegar, or vinegar in the pan, works well but you have to watch it very closely. In a matter of hours it can etch the surface. It’s not a bad alternative but it is something you don’t do and leave. You check on it like a sick child.

Slightly dirty pans can be cleaned with coarse salt, a little oil and a plastic scrubby. One rarely needs grand abrasives. Sand blasting a pan is on par with throwing it in an inferno. Kinder, gentler works.

I prefer cleaning pans by electrolysis. It’s a simple, effective, and cheap. There’s all kinds of  websites about it so I’ll just cover the basics. You put the pan in a liquid and send a low-voltage current through it. The current creates bubbles that cleans the crud off the pan and the current helps exchange ions getting rid of the rust. It costs only a few pennies a day and is totally friendly to the environment (see my video for more information.)  It also can restore a pan, actually add some iron to it instead of taking it away. It can be set up in a five gallon bucket usually with stuff found round around the home. In fact, three 50 watt solar panels adding up to three amps can run your electrolysis vat. Now that’s really green.
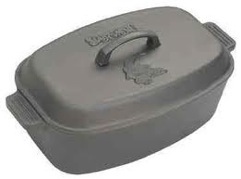
Oven Roast

When I am done cooking with a pan I simply wipe it out. I never wash my cast iron pan basically because they don’t need it. Sometimes I will put a little water in a warm pan to help clean it but never soap. You can use soap but usually it is not needed. Once clean I coat the pan with some oil. If I am going to store a

pan for a very long time, months in a wet climate or years, I coat them with pharmacy grade mineral oil. It doesn’t hurt the pan and what is left after you wipe it off doesn’t harm us.  Also, all season pans should be store with a paper towel between it and the next pan. This reduces surface damage and moisture that can promote rust.
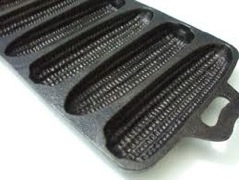
Corn muffin pan

Perhaps no other related topic is so rife with garbage on the internet than the seasoning of cast iron pans. It is cancerous with political correctness and completely removed from practicality. I think the worst that I have read was someone selling new pans and (proudly) saying he seasoned them with flax seed oil. Flax seed oil? That is just about the most unstable polyunsaturated oil there is. It is so unstable — read easy to oxidize — one never cooks with it, ever. To subject it to high heat for seasoning can create dangerous compounds and guarantees lousy performance. It is difficult to express just how stupid that is. I’ve also read where people spray a pan with no-stick spray then throw the pan in the oven at 500F for three hours, a pointless expensive exercise that might burn the house down.
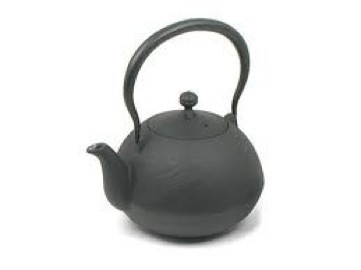
Japanese tea pot enameled inside

While I mean no disrespect to my vegetarian friends, vegetable oil is a poor class of oil to season a cast iron pan with. It gets gummy and it oxidizes leaving your pans with a rancid aroma and taste. The original is still the best, lard, also known as pig fat. My second choice would be tallow, either beef or lamb. The next question is why?
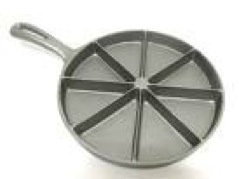
Corn bread pan

Animal fats are saturated, which means there is no place for an oxygen molecule to attach. It is oxygen that oxidizes and makes oil smell rancid. Lard is the most convenient fat to season with because it is comparatively cheap and widely available. It is easy to work with and produces superior results. If you absolutely must use a non-animal fat to season with, use coconut oil.

So with the choice of fat out of the way, what is “seasoning?” Simply put, the surface of the iron pan has minute pits in it. Seasoning is giving the surface a coating of carbon molecules which are not as sticky as untreated iron. Instead of a factory putting on a coating of non-sticky teflon (at around 600 degrees) you are putting on a non-sticky  coating of carbon at moderate heat. If you look at my video you can see exactly how I do it.
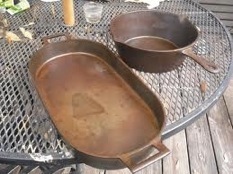
Open oven pan and sauce pan

I put the pan over moderate heat outside and constantly coat it with a light sheen of lard. When the pan loses that luster, within a few seconds, I add another coat. The pan smokes constantly. But over the course of a half hour to an hour the pan gets an excellent non-stick surface. If the flame is too hot, it will burn the carbon off. If too low the fat won’t carbonize. That is why moderate heat is best. Several layers rather than a one-shot oven deal is far superior as well. It may be a small detail but it is one that directly affects the function of your pan, the life of it, and ease of cooking.

While I don’t have to here’s what I do with every pan I season. After seasoning I cook a few pounds of bacon in it over a week or two, leaving the fat in the pan. By the time I am done nothing will ever stick to the pan.
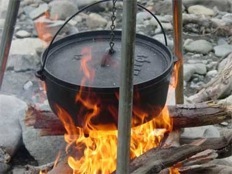
Dutch oven with adjustable tripod

Cooking

You can cook anything in a well-seasoned cast iron pan, from eggs to fish to steak. I do add fat, oil, or non-stick spray to the pan every time I use it as I would any frying pan. The pan is not totally stick-less but rather you want the food not to stick. If you crank up the heat real high and forget to put something in the

pan your seasoning will burn off. But, if you season, use a fat or oil and cook regularly with it, the pan not only is as good as non-stick pans but it gets better with use and age. Treat it right it treats you right. This is not a use and throw away pan. It feeds your family and it needs some care.
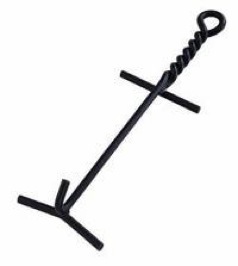
Hook to lift lids off campfire pans

There are, however, two things you have to watch. Acidic foods, like tomatoes, can be cooked in such pans but not left in them after cooking. The same rule applies with any liquid. You can cook a soup or a stew in a seasoned cast iron pan. Just don’t leave the liquid in the pan when you’re finished.  As always when done cooking, wipe the pan clean and dry.

And it is here I should add one remote concern especially if you cook a lot of acidic food. The pans do leach iron into the food you cook. For most people this is not a problem, even a health benefit. If however you have too much iron in your system or you are a man sensitive to excess iron (which can cause heart attacks) then cast iron is not the pan of choice for you. Most people know their condition already so excess iron from cast iron is not a common problem.
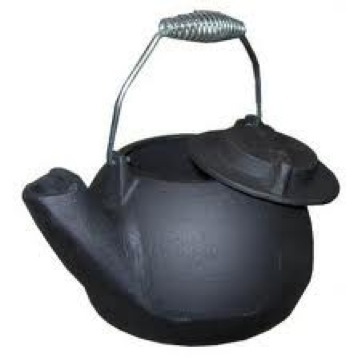
Cast iron Humidifier, NOT for heating water for consumption



{ 51 comments }