Giant puffball

Do not eat any mushroom without checking in person with a local, live, mushroom collector.  

Lycoperdon perlatum: Edible Puffballs

I avoided mushrooms for a long time, and with good reasons. Some of them are on par with cyanide and arsenic and can melt your liver. Worse, unlike most plants that let you know within the hour you have erred, mushrooms can wait several days. So when I decided to learn about mushrooms I went with the classic first: The puffball,  Lycoperdon perlatum (lye-ko-PAIR-don  per-LAY-tum) also called the Common Puffball, the Gem-studded Puffball and the Devil’s Snuff Box.

Most of us learned about puffballs when were were kids, finding them in the spore stage and flattening them into a puff of spore smoke. Remember the brown cloud that used to spray out from under our foot? Then it will come to no surprise to you that the genus name is Lycoperdon, which plainly said means “wolf fart.” As for the species name, perlatum means pearl-like and the puffballs often in clumps like a bunch of pearls.

While perhaps the puffball is the least complicated mushroom to identify, there are things you must absolutely look for and here is the reason why. Two other mushrooms can resemble it, both fatal.  The look alikes are young Sclerodermas and Amanitas.

Puffballs are white inside and one texture.

Puffballs are white inside and one texture.

Always cut your “puffball” from top to bottom and examine the inside. A young Sclerdomera will be round and white inside like a puffball but the white flesh will be hard. The white flesh of the puffball is marshmallow soft. The young Amanita can be round and white inside like a puffball but it will show the outline of the yet unopened mushroom. The Sclerdomera has caused deaths and the Amanita is nearly always fatal without medical attention and often fatal with medical attention.  See photos below.

The deadly Amanita can look like a puffball but has the outline of a mushroom-to-be inside.

The deadly Amanita can look like a puffball but has the outline of a mushroom-to-be inside.

Never take for granted you have a puffball. Always cut each one open vertically, top to bottom, and make sure it is one solid soft white mass inside with no outline.  You should make sure the inside is pure white, never dark, and that the outer skin of the puffball is thin. If the inside is dark from the start and the outer skin is thick you probably have Scleroderma, one of the earth balls.

With smaller puffballs you must make sure the entire fruiting body is homogeneous, consistently a texture of  marshmallows. You should slice down the center of every puffball to make sure there is not a pre-formed mushroom inside. If so, it is likely to be an immature form of the death angels, Amanita bisporigera, Amanita virosa, and Amanita verna. They are all deadly. Do NOT eat them. In fact they are quite cruel. Feeling better after the first attack is the sign of impending death.  Ninety percent of all mushroom fatalities involve Amanitas.

On the other hand, there are no poisonous puffballs, and most forms are edible when young. Though as with everything, some individuals are allergic to them. Giant puffballs, that can grow as big as a basketball, are not only edible but mighty difficult to mis-identify. They are edible as long as the flesh is white and soft.

Green Deane’s “Itemized” Plant Profile

IDENTIFICATION: Round or pear shaped mushroom up to 3.5 inches tall, tapered base. Outer surface is composed of conical spines and irregular-shaped whitish to cream-colored warts that become brownish with age. They eventually fall away leaving pits or net-like scars on the spore case beneath. The spore case is divided into an upper fertile portion (gleba) and a sterile, stalk-like base, tan to pale brown or grayish brown, darker in age, thin-walled, papery, gleba white and fleshy at first becoming olive-brown and powdery as spores mature.  Base sterile, chambered, taking up about a third to one half of the fruiting body.  Spores round, minutely warted, pale yellow (yellow-brown to olive-brown in mass.)

TIME OF YEAR: Nearly year round in warm climates, summer fall in northern climates.

ENVIRONMENT: Usually in groups, often in clusters on ground, sometimes on well-decayed wood, in forests or open areas.

METHOD OF PREPARATION: Edible when immature and entirely white inside and soft.  Can be sauteed in butter or added to soups and stews. Cut every puffball vertically and check to see that there is no outline of a mushroom inside.


{ 31 comments }

Scorpions

Florida Bark Scorpion

Southern Fried Scorpions

If I were going to rely on scorpions in Florida for sustenance, I would starve to death.

Guiana Striped Scorpion

In over 30 years of rummaging around the wild of Florida I have seen scorpions exactly three times, twice under domestic conditions. Once while living in Titusville there was one on my sink next to the soap dish, not much bigger than a cockroach. (This was the same apartment complex where I saw two rattle snakes up close and personal. I’ve only seen one rattler in the wild.)

Heinz Scorpion

The next scorpion sighting was also in Titusville at a statuary store outside. I moved a small statute and a half a dozen little ones scurried away. Only once on the trail have I run into a scorpion. I was near Lake Tarpon in 2010 giving a class and talking about pines when a student pulled off some bark and found a very tiny scorpion, a Florida Bark Scorpion, Centruroides gracilis, which grows up to four inches long. Non-deadly, but painful and most painful of the local three (or four) scorpions. If stung while in gastronomical pursuit clean the site with soap and water and hold an ice pack against it to reduce swelling. (Others say run as hot a water as you can stand over it for 10 minutes. Choose your poison, so to speak.)

Asian House Scorpion

Other scorpio contenders in Florida are the Hentzi Scorpion (Centruroides hentzi) the most common and smallest, up to two inches. And the Guiana Striped Scorpion (Centruroides guianensis) the middle-weight, up to three inches.

The problem is the one I saw in my apartment some 30 years ago didn’t look like any of those three. Perhaps it was the Isometrus maculatus, selectively imported from Asia and called the House Scorpion.  It is usually found in port cities. Titusville is not exactly a port city but is on the inter-coastal boat route.

Vaejovis carolinianus also lives east of the Mississippi River but not in Florida

The Guiana Striped Scorpion is supposed to be in only Collier, Miami-Dade and Monroe counties, including the Keys. However there are unofficial reports of it in Pasco County. Hentz is the most common but is not found in the lower Keys. The Florida Bark Scorpion is widespread but mostly in the lower two thirds of the state. The only other scorpion east of the Mississippi is the Vaejovis carolinianus, which tends to reside in other southern states. In the United States, there are 90 or so species of scorpions. Only one in the desert southwest is considered life-threatening if stung.

Scorpions glow in the dark under UV light

Florida scorpions should be edible but I have not run across  enough to give them a try.  I suspect if one goes looking for them they are easier to find. If they are like most scorpions they are edible, usually cooked. However, do not eat them if you are allergic to seafood. They are related to crabs, lobsters and shrimp.

About the stinger. The Chinese maintain that if the stinger is cooked the poison is weakened but even then they caution not to eat more than five at a time. They view the cooked stinger more as medicine than food. From a culinary point of view, remove the stinger before or after cooking. Or at any rate don’t eat it unless you know something about the toxin and Chinese medicine.

As for glowing under Ultra Violet light,  upper left, no one knows why scorpions glow in UV light. Let’s think this thing through. Flowers look different under UV light because it confers some advantage. In their case being found by insects. So what are the possibilities? Scorpions glow to help scorpions find scorpions, or glwo to help insects see them, either to avoid or find. Or perhaps it is the same as flowers: The scorpion glows under UV light, the insect is attracted, and the insect is the scorpion’s dinner. To our eyes the scorpion only looks different when in the dark and lighted by UV rays. In daylight the scorpion could look much different to an insect, just as flowers do. The only question I would have is whether that a difference is an attraction or a warning. Oh, scorpions are cannibalistic, and can live three to five years.

Deep fried scorpions are the most common way they are served. They are stuck on a skewer and plunged into hot oil. At home you might want to freeze them first, snip off the stingers, then fry.

Scientifically, Centruroides (sen-true-ROY-dez) is Dead Latin’s bastardized Greek meaning sharp-ended tail-like. Hmmmm. Not too inventive there. Gracilis (GRAS-il-is) is slender or graceful. Guianensis (gwee-an-NEN-siss) of Guiana. Vaejovis (VEH-joe-vuss) is based on the name of the Etruscan god of the underworld. Carolinanus (care-row-lin-ee-AY-nus) means of southern United States. Isometrus (eye-suh-MET-truhs) combines is Greek combining uniform and measure to mean single. Maculatus (mal-yuh-LAH-tuhs) is Latin for spotted. Hentzi is for Nicholas Marcellus Hentz (July 25, 1797 – November 4, 1856) a French American arachnologist born in Versailles, France. He emigrated to the United States in 1816.

Scorpion Soup

Ingredients

½ cup olive oil
30-40 live scorpions, washed
4 ounces fresh pork
1 large garlic bulb, crushed
fresh ginger root, about one-inch piece, chopped
salt and pepper
½ liter water
1 handful dried Chinese dates
1 handful dried Jujube berries (optional)
1 large carrot, sliced

Preparation

Heat the oil in a large wok. Stir-fry the scorpions for 20 seconds. Add the pork, garlic, salt and pepper. Stir-fry briefly, then add the water slowly. Add the other ingredients and simmer on a low heat for 40 minutes.

Scorpions have a woody taste and should be eaten whole, except for the tip of the tail.

 Scorpion Scallopini

8 hairy desert scorpions, or similar species, thawed

1 pint low fat milk

1 cup white cornmeal

2 tablespoons unsalted butter

1 tablespoon fresh lemon juice

2 tablespoons fresh flat-leaf parsley, chopped

Using a sharp knife, remove and discard the stingers and venom glands from the tips of the scorpions tails. Pour milk into a medium-sized bowl; add scorpions and set aside. In a 12-inch skillet, melt butter. Remove scorpions from milk mixture, allowing the excess to drain off. Dredge scorpions in cornmeal, one at a time. Shake off excess. Place scorpions in hot butter and cook until golden brown (approximately two minutes), turn and cook a minute more, until done. Drain on paper towels. Once plated, sprinkle with lemon juice and salt.

{ 9 comments }

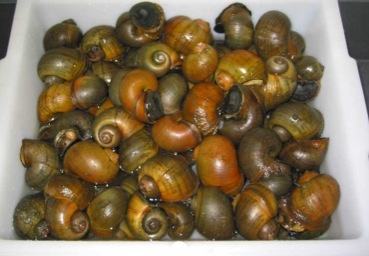
Gourmet apple snails found in the wild

Are Slugs edible? What about Snails?

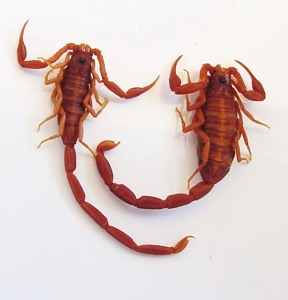
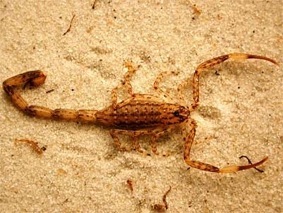
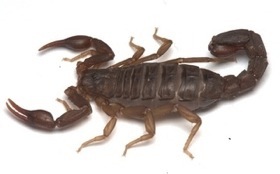
There is only one rule you have to remember: When it comes to land snails, land slugs, and fresh water mollusks you must cook them thoroughly or they can kill you. Got that? Taste is a secondary consideration.

Okay, why cook them? People do eat slugs raw on a dare, and North American natives used live slugs to numb gums, tongues and toothache. These common little creatures aren’t too bad unto themselves, but some of the land crawlers especially in warmer areas have parasites, one of which they can get from rat feces. That parasite, normally infecting a rat’s lung, goes from your stomach to your brain, crawling there over time — yes, crawling there — and causes your brain to swell. That big head folks have accused you of having will come to pass and kill you.  Thorough cooking will kill the parasites.

Some of the freshwater mollusks (clams, snails et cetera) are in water with bacterial waste, be it beavers’ or Butt Head’s. Cooking thoroughly kills all bacteria and parasites. It is recommended you collect said, especially slugs and land snails, while wearing gloves and or be careful, have no cuts on your hands, and wash your hands immediately and until then keep them away from your eyes, nose and mouth… the same precautions you would do if you handling raw chicken. The chances of you getting the disease are really low should you eat a slug raw. A few have been sickened that way, but the possibility is there: Avoid it.

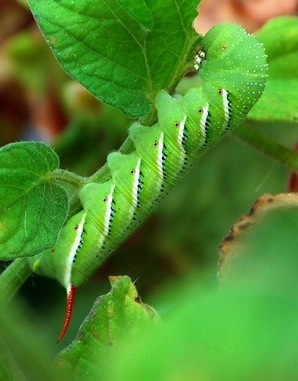
Now what about taste? Some taste good, like escargot, some taste bad regardless of preparation, some have no taste. But there are no truly poisonous slugs or snails. Once cleaned and cooked, or cooked and cleaned,  it is a matter or preparation and personal taste.  Slugs are just snails with no shells, and snails are really just specialized clams that moved from water to land. By the way, all of this applies only to land slugs, land snails and freshwater mollusks, not slugs and snails and mollusks in salt water.  (Salt water slugs tend to be toxic.)

Apple Snail laying eggs

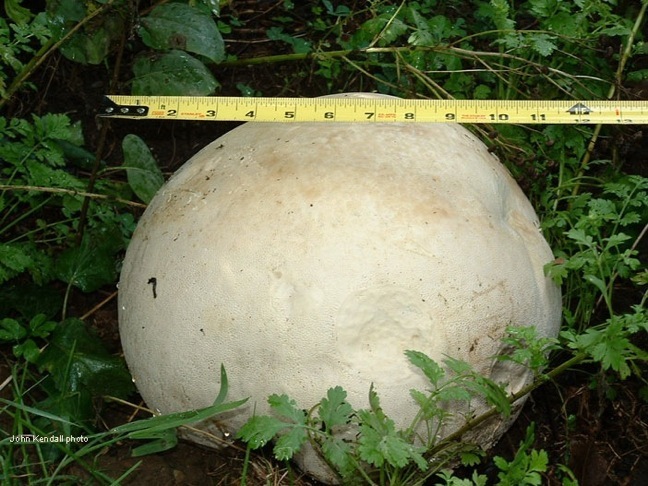
Here in central Florida we’ve had a gourmet invasion of Apple Snails. Thirty years ago they were introduced to such places as Taiwan and Japan as delicacies. They were also favored among aquarium owners because of their looks and speed of growth.  They never caught on big with Asian gourmets and some how got released into Florida lakes.  One lake near here, Lake Brantley, went from no Apple Snails in 2003 to being overwhelmed in 2004. The battle has been on going since and the fear is from that lake the snails will invade the Weikva River, just a few wet miles away. And the Weikiva leads to virtually half the state. Personally, I haven’t seen any non-native Apple Snail eggs in the Weikiva basin but it’s like having an open gallon of gasoline next to a roaring fireplace. It only takes one bird to drop one uneaten snail in the river.

Let’s hear from an expert on the edibility of snails, Dr. Tim Pearce, Assistant Curator and Head, section of Mollusks, Carnegie Museum of Natural History, Pittsburgh, Pennsylvania:

“As far as I know, any land snail is edible. Although I don’t know any land snails that are poisonous, I do know one species that tastes very bad (Anguispira alternata, the tiger snail). Most species of land snails are very small (less than 1/8 inch or 3 mm), so eating them would be a challenge. But (despite being a vegetarian) I have eaten some of the native snails with shells 3/4 inch (20 mm) diameter. Maybe you want to know where to find the snails that are commonly eaten as escargots. Those species are from Europe. Some of them have been introduced into the United States, but most of them are considered pests. For example, Helix aspersa, one of the most commonly eaten land snail species, is a very abundant garden and agricultural pest in California. I think Cepaea nemoralis is also eaten; it is another introduced species and not generally considered a garden pest. There are populations of C. nemoralis in eastern New York, and a few populations in Pennsylvania in the Philadelphia area.  Be sure to get permission from the land owner. Note also that transporting living land snails is now regulated by the federal government . Also, if you collect the native species, be careful not to over collect. The native species generally reproduce more slowly than the introduced species, so over collecting could wipe out a population.”

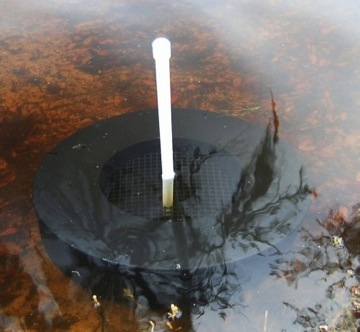
Snail traps don’t have to be baited

Locally, the easiest way to identify snails in a given body of water is to look at their eggs, their size and color, usually found on stems of water plants above the water line. You can also find their empty shells on shore where they’ve been dinner already. Native Florida Apple Snails lay white eggs on the large size, like peas. Island Apple Snails lay small pink eggs that turn white. The Skipped Topped Apple Snail lays salmon colored eggs and the Titian Apple Snail lays eggs that are pastel green or sea foam green.

How do you get the snails? You can noodle around for them or use a trap. There are commercial traps or you can make one out of an oil drain pan.

So snails are edible, you’ve got that. You’ve heard of escargot, but what about slugs? Dr. Pearce again.

You can also make an Apple Snail trap out of an oil catcher.

According to Dr. Pearce, counting all gastropods in the sea, freshwater, and land, a good estimate is that there are about 80,000 species. For just the land snails, they estimate about 35,000 species in the whole world. In North America north of Mexico, there are about 1,000 species of land snails. Pearce says he can almost guarantee that in eastern North America, all the slugs in your garden are non-native species from Europe. Incidentally, the gigantic land snails native to Africa and now found in Florida are edible.

“Species that are successful invaders tend to have fast reproductive rates, probably explaining why there are so many of them in your garden.  For some reason, slugs seem to be better invaders than snails do,” he said.

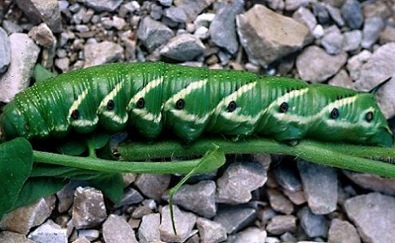
So, we know slugs are edible, unless they been feeding on some poisonous plant. Ray Mears, best known of the professional bush crafters, does not recommend eating slugs because they often feed on mushrooms, and most of them are toxic, and Mears is an expert on edible mushrooms.

To avoid getting mushroom poison from a slug it is usual to either starve the slug before eating or feed them for several days before serving them up. The Romans used to fatten their snails with meal and wine until they got huge and tasty. In Italy they are sometimes kept in bran for several days before eating. In many places in Europe people have home-made snail-preserves, or escargotieres, little corners of gardens enclosed with boards and netted over the top. In these enclosures hundreds of snails are kept and fed vegetables and herbs to flavor them. The same could be done with slugs.

Before I move on to cooking snails, how do you collect them, other than snorkeling? Do what those who capture snails to get rid of them do: Trap them. There are two simple traps. Take a small crayfish trap and either lay it in the water/reeds half in the water, half out. Or in deeper water arrange the tap vertically half in, half out of the water. Surprisingly traps work with or without bait.  The second trap looks like an old tire with a grate in the middle and a stake through it. Imagine the grate slightly smaller than the opening and set a couple of inches lower as well. The snail crawls over the tire, on to the grate then off the grate into the trap below. This should be done in water just reaching the top of the tire. An inexpensive alternative is a plastic oil drip pan with the grate cut smaller than the opening and a piece of PVC put through it and the pan to hold it at the right height.

Cooking snails:  Put some water into a saucepan, and when it begins to boil throw in the snails and let them boil a quarter of an hour; then take them out of their shells, wash them several times, clean them thoroughly, place them in clean water, and boil them again for a quarter of an hour. Then take them out, rinse them, dry them, and place them with a little butter in a frying-pan, and fry them gently for a few minutes sufficient to brown them.

To cook snails the French way crack the shells and throw them into boiling water, with a little salt and herbs, sufficient to make the whole lot savory. In 15 minutes take them out, pick the snails from the shells, and boil them again; then put them into a saucepan, with butter, parsley, pepper, thyme, a bay-leaf and a little flour. When sufficiently done, add the yolk of an egg well beaten, and the juice of a lemon or some vinegar. Snails have about 90 calories per 100 grams of meat. They are high in protein (12 to 16 percent) and rich in minerals.

Cooking slugs: Slugs, far more than snails, eat toxic mushrooms. If it is the season of toxic mushrooms the slugs should be kept for many days and fed meal or brand or lettuce to purge them. Put pre-fed slugs into a 50/50 mixture of water and vinegar. This will kill the slugs and force them to release mucus. Simmer five minutes it boiling water. Change the water and boil again for ten minutes. Change the water a third time and boil again for fifteen minutes (so you have three changes of water and a total of 30 minutes boiling time.)  If the slug has a foul tasting digestive organ remove and rinse. The cooked slug is now ready to eat or use in other dishes.

Another way to cook snails is to put them upside down next to your fire and leave them there until they bubble vigorously.

Slug Fritters

Ingredients

10 cooked and cleaned large slugs

1/2 cup of cornmeal

1/2 cup of flour

3 eggs

1/4 cup of heavy cream

4 tbs. Of butter

4tsp.of sour cream

Instructions

First chop the slugs into fine mince, then beat the eggs with the heavy cream together. Sift the dry ingredients and then cut two tablespoons of butter into that mixture. Add the egg and cream mixture to the dry ingredients and whip with a whisk vigorously for one to two minutes. Melt one tablespoon of butter in a sauté pan and pure the batter into 2 1/2 inch cakes in two batches. Serve warm with a dollop of sour cream. Yields four servings.

Slugs that are still in palatable after boiling can be fried until crisp and tried, or ground into a flour and added to other meals for nutrition.

According to the Journal of Experimental Biology, August 2006, slugs are 5.1% carbohydrates, 0.5% fat, 7.1% protein and 85% moisture. When cooked they are probably lower in carbs because that is contained in the mucus which is lost in cooking. Slugs were on the diet of many Native Americans in the northwest US, where they have some 27 different kinds. German immigrants to that area gutted them and fried them in batter.

Incidentally, freshwater clams can make “pearls” and they command a high price.  When I was a kid I use to use freshwater clams for bait and collected a few black pearls at the same time. I had a girlfriend at the time who was quite fond of them… probably still is, and she didn’t have to get wet to get them.

Also, check with your local authorities and do not collect endangered species or exceed harvesting limits. Many exotic species have no limit.

Australian doctors issued a warning in October 2003 about eating slugs after a Sydney college student (Sam Ballard) contracted a potentially fatal brain disease when he swallowed some raw slugs on a dare. Tests found the man’s meningitis was caused by a worm normally seen in rat lungs but carried as larvae in slugs and snails. The worm caused the brain lining to swell, forcing doctors to drain fluid from inside the man’s skull. He was hospitalized for 17 days with brain lesions. It was five months before he could resume his studies. A friend of the student also ate some raw slugs as part of the dare but threw them up, losing the bet. Ballard died in 2018.

The doctors said there had been numerous cases of meningitis since 1971 caused by people eating garden snails or slugs. One child died after eating snails and one patient contracted meningitis after eating lettuce covered with snail slime, according to a report in the Medical Journal of Australia.

To watch a video on eating slugs, go here.


{ 28 comments }

Commercially made solar oven with extra reflectors

Solar cooking. Something new under the sun

Once you cook your first solar meal, you’re hooked.

Does it cost less than conventional methods? It can, but you have to make it cost less. Is it more convenient that conventional methods? It can be, but you have to make it so. Does it cook better than conventional cooking? It can, if you learn how.

Campfire cookin is different

Cooking with solar is very much like cooking with an open fire, or a real barbecue. You have to be more involved with the process than when you cook conventionally.  And while the cost, convenience and cooking methods may not be better  than conventional ways, there is much peace of mind and confidence that comes with being able to cook “off the grid.” Let’s look at these three aspects of solar cooking: Cost, convenience and cooking method.


Cooking a chicken in a homemade solar cooker

You can make a $15 solar cooker out of a windshield reflector and an oven bag, and if you use it seven times or so, you are ahead of the game financially. The more you use it, the more money you save. I live in a sunny climate and can use a solar cooker or solar oven nearly every day of the year. In time the savings add up. If you buy a commercial product and only use it now and then, it is not cost effective but it still has value in that it can be used when you have no electricity, gas, or wood. You can view it as part of your storm or emergency preparations. As long as it is sunny I can cook a hot meal and sterilize water.  A week after a disaster what is the value of a hot mean or safe drinking water? I think more than a solar oven costs. In 2004 used it after four hurricanes in six weeks knocked out power for a total of three weeks.

Solar Ovens have to be orientated

Is it more convenient? Yes and no. It depends on what you’re cooking. I regularly cook a chicken at least once a week in my solar oven. I prep the chicken and put it out in the sun around 10 a.m. solar time, 11 a.m. Daylight Savings Time. (I never go off solar time. See my article on said.) It will be done by 1 p.m. (see my video about it.)  Also, solar cooking is moist and gentle so if I forget it and leave it two more hours, no harm done. It will just be more tender. I do have to move the oven every hour to hour and a half to point it towards the sun, but even that is forgiving. Often I will be gone all the time I am cooking the chicken. So I point the cooker due south and plan on eating around 3 p.m.. My chicken will be done, as well as any vegetables I toss in.

Oddly there are a lot of presumptions about solar cooking on the internet about how hot a solar oven can get (and also how hot food has to be.)  Water is sterilized at 165º F. Yes boiling is the given standard but that was created for practical reasons not germ reasons. If you don’t have a thermometer, and most folks who are in the situation to sterilize water for emergencies usually don’t have a thermometer, then boiling is a non-thermometer way to tell the water is sterile. However, 165º F will do quite nicely and in fact solar ovens used in Third World Countries explicitly for sterilizing water are equipped with a device that indicates when the water has hit 165º F.

Depending upon the time of year, angle, and added reflectors, my solar oven can range from 275º F on a cold day near Christmas to well over 400º F on a warm summer day. Other than time spent cooking most foods are not affected by the cooking temperature. An exception is bread. If it is winter, I bake corn bread, if summer, whole wheat yeast bread.

Food in a solar oven (or cooker with oven bag) begins to cook at 185º F.  Normally, solar ovens and cookers approach 300º F degrees, more than hot enough to cook food. My solar oven and cooker takes about a half hour a pound to cook a chicken or other meat. Root vegetables about the same amount of time.

If I want beans and rice in a casserole, I solar cook the beans first in extra liquid then add the rice to finish off and absorb the remaining liquid. Solar cooking is very moist so water loss is minimal. Often I will use wild rice and toss it right in with everything else since it takes at least an hour to absorb water and is hard to over cook. In fact it is similar to something my mother used to do.

When I was a kid my mother would make what we considered authentic New England Boiled Dinners, mostly water, root vegetables, whole onions and a piece of meat. Into the pot it went and was boiled until done. One reason why she liked it was it kept on the stove. The dinner would stay warm on low and you could eat it anywhere over a several hour time span. Food cooked in a solar oven is very much the same way. It’s boiled dinner friendly. You can leave almost anything much longer in a solar oven than planned without having it over cook.  That adds to the convenience.

Just as one changes cooking styles for a crock pot, one changes them for a solar oven. Indeed, crock pot recipes work well in a solar oven. My oven will also do two pots at a time but the only time I might use two is for water for pasta. Usually I just plan on adding my pasta to the dish and letting it absorb what water it needs from the dish itself.

If one wants solar cooking can be cost effective, convenient, and fun. Since it is moist cooking and more gentle than a dry oven I think the food is more wholesome as well. The only down side I have run into is clouds that move in after I’ve started cooking. A look at the forecast solves that issue. Twice I’ve not checked the forecast and had clouds move in when my meal was half done. In those two instances I just finished them off in a conventional oven or microwave.

I have two commercially made solar ovens, an oven I made out of a wooden box, and a solar cooker made from a windshield reflector and a parabolic one made from an old beach umbrella. All work well. I haven’t covered solar fryers, which are big parabolic collectors and require sunglasses and constant attention but can fry (and burn food.) But, stand by… I am making one out of an old satellite dish and mylar.

Generally said the recipes below work for a lidded pot in a solar oven or in an oven bag in a solar cooker, or pot in an oven bag in a solar cooker. When ever “cooker” is mentioned the food must also be in an oven bag. Generally the solar oven or cooker should be redirected towards the sun every hour or so. Time of year, latitude and amount of solar collection influences the length of cooking.  Usually one cooks between 9 a.m. and 3 p.m. with 10 a.m. and 2 p.m. being peak heat hours (solar time.)  Many insist you use only black pots but I have done quite well with glass pots with glass lids, particularly in the oven bags while using the solar cooker. While I have changed the recipes the originals are by the courtesy of the Solar Oven Society.

This recipe, however, is mine. I take any hollow squash, butternut for example, and drill a small hole in it to let off steam. Then I put it in my solar oven, hole side up, for about three hours. They cook quite nicely. Next what I need to do is make a larger drill hole and pour in some honey and spices….

Baked Acorn Squash

* 1 acorn squash cut into 2 halves and seeded

* ½ tsp. fresh ground black pepper, or to taste

* ½ tsp. coarse salt, or to taste

* ½ tsp. ground cumin

* 2 tbs. butter

  1. 1.Place the 2 squash halves in one long cooking dish.  2. Divide the other ingredients evenly between the two squash halves. 3. Put lids on the black cooking pot(s) and place them in the Sport solar oven. Clip the clear lid to the oven. Face the oven into the sun and then rotate it clockwise 30 degrees. Relax and do other things. The squash can be left unopened the entire cooking time. Check doneness in 3 hours. Cooking time: 4 – 6 hours, serves 2 –4

 Solar Baked Fresh Fish Fillets

Cooks quickly in 45 minutes to 75 minutes on clear day.

4 each, 1/2 pound, fresh fish steaks, 1–1½” thick (Fish fillets – any shell fish, tuna, salmon or any white meat fish.

The Sauce:      2 tbs. butter, 2 tbs. fresh lemon juice, 1 sprig of fresh, chopped, flat leafed parsley, salt and fresh ground pepper to taste

1. Place 4 fillets in a baking dish, put ¼ of the sauce ingredients on top of each fillet.

2. Cover the pot and place in solar oven/cooker. Face toward sun with the shadow directly behind the oven. Do not open the oven to check for doneness until 45 minutes have passed. Serves 4.

Baked Potatoes

This recipe is based on potatoes weighing 1 lb. each. For smaller potatoes the cooking time will be shorter.

* 2 lbs. bakig potatoes per pot

* 2 tbs. minced flat parsley per pot

* 2 tbs. minced fresh chives per pot

* fresh ground pepper and salt to taste

* butter or olive oil to taste

  1. 1.Wash and dry the potatoes. Prick each potato a few times. 2. Place half of the dry potatoes in each Sport cooking pot. Do not add liquid. 3. Put lids on the pots (black colored the best) and place them in the solar oven/cooker. The potatoes can be left unopened the entire cooking time. Check in 2 hours. 4. To serve, open the potatoes and sprinkle with the parsley and chives, add salt & pepper and butter to taste. Cooking Time – up to 6 hours, serves 4 – 6

 Boneless, Skinless Chicken Breasts With Tomatoes, Olives and Capers

Cooks in 1 – 2 hours on clear day

* 4 each, boneless, skinless chicken breasts – about 2 lbs total

* 2 tbs. olive oil

* 1 sprig of fresh basil, chopped

* 4 oz of pitted and sliced kalamata olives packed in oil

* 2 oz capers, drained

* 14 oz of fresh or petit diced canned tomatoes, minced

* 8 tbs. olive oil

* salt and fresh ground pepper to taste

Make the Dish

Wash and dry the breasts on paper towels. Rub each piece on all sides with the olive oil. Place 2 tbs. of the olive oil in the bottoms of each of the pots and coat the entire bottoms. Add two breasts to each pot, divide the sauce ingredients between them and salt and pepper to taste. Pour 2 more tbs. of olive oil over the ingredients in each pot. Mix the contents of each pot well. Cover the pots. This dish will be done in 1 – 2 hours. Serve at once. Serves 4.

 Pot Roast

One beef chuck or similar roast- about 3 lbs. Cut the meat into 2 or 3 chunks, put the roast into a pot. Empty one package of dry onion soup mix over the meat, cover, and cook in the solar oven for 4 to 6 hours at 200 to 250F, less if hotter, longer if cooler.

Baked Chicken

Take a three to four pound chicken, season with your favorites spices or use a zesty Italian dressing powder sprinkled all over it. You can put sliced potatoes under the chicken or around the top edge of the pot. On top they may brown a little, under the chicken that add flavor to the stock and come out like tasty boiled potatoes. Other sliced vegetables can be added as well. Cooking time two to three hours depending upon the conditions.


{ 5 comments }

Tomato Horn Worm

Manduca Cuisine: Eating Green Gluttons

You’re picking tomatoes and suddenly there it is:  Big, ugly and green, a tomato hornworm. To which I say, get or the frying pan., well, almost.

Tobacco Horn Worm

Up to four-inches long the worm has a horn on the back end. That and its stripes help you identify it because two big worms like your tomatoes. If it has chevrons and a black horn it is Manduca quinqueaculata, the Tomato Hornworm (above)  If it has seven diagonal stripes and a red horn, it is  Manduca sexta , or the Tobacco Hornworm (right). It would have been nice if they had called the one with the red horn the tomato one but they didn’t.  Black horn = Tomato. Red horn = Tobacco. Numerous text and photo entries on the internet have them backwards.

The Tobacco Hornworm (red horn) is found chiefly in southern states, the Tomato Hornworm (black horn) in northern states but neither exclusively so. Both are edible after cleansing. Both are the larval stage of the hawk or sphinx moths and you can find both on the same plant. They are located on the outer areas of the plant at dawn and dusk, near the interior of the plant during the day. The larvae don’t like direct sun.

These hornworms feed only on Solanaceae plants, usually tomatoes or tobacco. However, larvae will also attack eggplant, pepper, and potato. There are many solonaceous weeds that also serve as hosts if tomatoes aren’t around including horsenettle, jimsonweed and various nightshades. Some of those are toxic. That is why you should keep the worm around for a few of days or more and feed it something wholesome (a bit of green pepper or red tomato) before cooking, or starve it for a couple of days until it offloads any toxic frass. Personally I would think twice about eating either hornworm that was found on tobacco. Nicotine is a powerful substance. It is also reduces clotting. Who knows, maybe dried Tobacco Hornworms who fed on tobacco can be used as a blood thinner should society fall apart.

As for the names, the genus Manduca (MAN-doo-ka) means “glutton” because these larvae eat a lot. Sexta means six-fold because the moth has six spots on its underside. Quinquemaculata (quin-cue-mah-cue-LAH-tah) means five spots because the moth has five spots on its underside.

Method of preparation; After purging, gently fried, sauteed if you will, or roast. Natives then strung them on a string and used them as a food necklace while traveling. If you want to raise them for food you can make them an artificial diet. There are several. Here is one:

Ingredients: One cup of non-toasted wheat germ, 1/3 cup non-fat dry milk, 4 tablespoons agar, one teaspoon raw non-boiled linseed oil, 1/2 tablespoon nutritional flake yeast,  one 1000 mg vitamin C tablet, two vitamin B tablets, two multivitamin tablets, one tablespoon sugar, 2.5 cups of water.

Place vitamin tablets in a blender and reduce to a powder. Add the wheat germ, powdered milk and sugar. Blend until well-mixed. Remove the dry mix. To the blender add 2.5 cups of boiling water. While set on a low speed, add the agar. Blend for one minute then add the dry mix and mix. Add the linseed oil, increase blender speed and mix well.

If plain sauteing or roasting is not for you here is a recipe from David George Gordon’s “Eat-a-Bug Cookbook”.

3 tbs Olive Oil

16 Tomato Hornworms

16 Basil Leaves

4 Medium Green Tomatoes, 1/4″ Sliced

White Cornmeal

Salt and Pepper (to taste)

1) Lightly fry the Hornworms in a pan for a few minutes. Be careful not

to rupture the exoskeleton with the high heat (aesthetics). Set aside to drain

2) Sprinkle Tomato slices with salt and pepper then coat with cornmeal.

3) Fry Tomato slices on both sides until lightly brown.

4) Top each Tomato slice with one to two Hornworm. Top each Hornworm

with a Basil Leaf.


{ 16 comments }