How did primitive man cook without pots or pans?

Mesolithic Cooking: It’s the Pits

How do you cook without pots or pans?

It’s a question our distant ancestors never asked because pots and pans didn’t exist. They just cooked food as best they could, and it wasn’t always easy. When Europeans first came to North America the first request and the one thing the American Indians wanted most was metal pots. I can’t help but think squaws knew a good thing when they saw one and told the braves “no metal pot, no come into the wigwam tonight.”

Several books and numerous professional monographs have been published on cooking before metalware, particularly in the Mesolithic Age, or the middle stone age.  And of course there are hundreds of camping books with various tips about primitive cooking. Not wanting to reinvent the wheel this will just be a random collection of some techniques and food in rough alphabetical order.

Historically, the experts tell us man has been cooking food for close to a million years. For most of man’s history he cooked without pots, pans, or ovens. The first containers would have been wooden, dug out bowls (and canoes.) Baskets can also be made to be water tight or to cook grain in. One would like to think clay pots were instrumental in cooking, and there is some evidence they were, but they seemed to be more a vessel of storage. Clay is fragile and porous. This is how the ancient Greek invented their wine called retsina. They had to line clay pots with pine pitch to keep them from seeping away the wine. The pitch-flavored wine has been drank ever since.

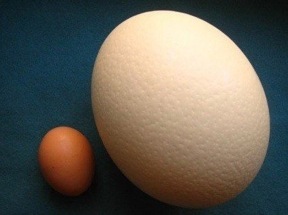
The first metal pots appeared about 4,000 years old in the Old world, which means they are found in digs from about 2,000 BCE on. It is difficult to think of a metal pot as being revolutionary but it was, nearly as revolutionary as the invention of another metal marvel, the stirrup, which dramatically changed warfare. Today we boil an egg within a few minutes over instant fire. We rarely consider that same act took at least a half a day in the past to do, which is why eggs were roasted. It only took minutes. I suspect boiling was used mostly for medicines or occasionally for variety.

More to the point, many of the techniques can still be used. Some are very convenient. Some are still labor intensive. But if you are going to go into the woods and you also plan to eat knowing how cook without pots and pans is a skill every forager should know. In hunter-gatherer societies today they often cook without pots and pans and are very particular how they use their fire. They are using well-proven techniques as old as man.

Acorn mush: Drop hot acorn mush into cold water. It will form a rubbery ball that keeps well. (I am presuming you leached the acorns first.)

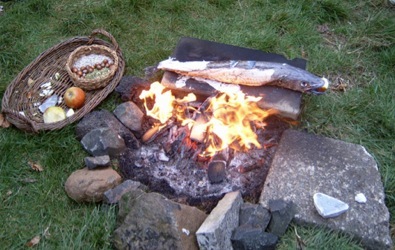
Ash cooking: Fish and simple breads wrapped in leaves can be easily and quickly cooked on near-dead coals. There are still coals but they are covered with gray ash. Turn the fish in seven to 10 minutes. Or, put some coals on top. Thin dough wrapped in leaves cook quickly.

Bamboo: Bamboo is hollow between nodes. You can stuff the hollow section with food, plug the top with grass or the like, then lean the tube over a fire. You can boil water the same way or make soup. Another method is to get a three section piece. Punch a small hole through the top and middle nodes (inside.) Put in water and let drain to bottom section, put food in top section. Place the bottom section near the fire, steam will rise and cook food in the top section.

Boiling water: Any boiling in the distant past, which was rare, was done in dug out canoes, wooden bowls, animal skin buckets, or clay pots. Hot rocks were put in the wooden, kin, or clay containers to heat the water. Know that a skin bucket of water suspended over a low fire will not burn. In England at ancient hut sites yard-wide and half as deep holes were carved into the solid rock. With hot coals in the bottom a skin could be stretched partially across the top for making soup or the like. No doubt the hide also added flavor… welcomed or not… Another technique was to put water in a natural shallow rock pit then add hot rocks. Whenever you use hot rocks to boil water the food should be wrapped in grass or leaves. This keeps ash and bits of debris from the rocks from dropping onto the food.

Bread: Bread can be rolled into a long skinny roll then wrapped around a branch like a climbing vine around a trunk and then positioned over the fire. Make sure you pick a safe wood to use such as sycamore, maple, dogwood, willow et cetera.  Bread can also be cooked on a flat hot rock or wrapped in leaves (see Large Leaf entry.)  If you have a primitive (or modern oven) one way to bake bread is to pour several pounds of honey in a bowl, drop the bread dough into the honey, and put the whole thing in the oven. The result is a sweet bread from a very ancient recipe and cooking method. Bread can also be cooked directly on hot coals. The outside will burn but the inside will be edible.

If you have boiling water and a square of cloth you can mix some spices, greens, bits of meat and flour together with a small amount of water to make a dough. Wrap it in the cloth and drop it in the boiling water. It will cook quite quickly.

Cattails: Take a clean cattail rhizome (root) and put it next to a fire or on coals. Literally burn black the outer layers of the root. This cooks the starch in the root fibers. After the outside is burned, open the root peeling the black part back or off. Pull the white fiber between your teeth to get the starch off. This is very easy and take a minimal amount of energy to get a high calorie meal (see my video on said.)

Clay:  Fine clay mixed with a little fine sand was a common means of cooking food where it was abundant. Stuff the food to be cooked, such as a fish or a duck, wrap it in grass, secure, then give it a good coating of clay. Put the clay-covered meat on a flat surface a bit of a distance from the fire and gently dry the clay, turning the meat as needed to ensure all of the clay is dry including the bottom. You do not want any wet spots or holes for the moisture to escape.  Once dry the clay-encrusted meat can be put on the coals or closer to the fire.  The grasses keep the clay and the flesh apart. Your average duck takes two hours to cook this way, turning once.

Small birds can be cooked without plucking. Smeared the clay onto their feathers, dry, then cook. When done this way the bird’s skin cannot be eaten. Porcupines can also be cooked by covering them with clay. When the clay is removed the spines come with it.

Conch: Lay the whole conch, or similar large mollusk, foot side up directly on coals. The entire shell acts as a pot. It is done when it froths.

Crab apples: Some bitter crab apples can be made edible by roasting them next to a fire.

Crayfish: Dispatch them by putting the tip of you knife into their backs just behind the head. Put them on short skewers, tail to head, then arrange vertically near the fire. Their legs et cetera will wiggle as they cook even though dead. When they are hot and red, enjoy.

Drying meat: Suspend thin strips of meat on a tree branch and put over a small fire. It is the updraft that dries the meat, not the heat. You don’t want to cook the meat. A smokey fire reduces the number of interested flies. Do not use conifer wood for the fire or to make smoke or you meat will taste like a pine tree. You can also put strips of meat to dry in the sun on rocks. If you need salt, you can evaporate sea water.

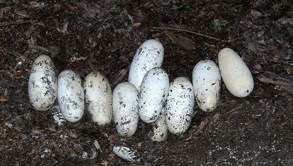
Eggs: All bird and reptile eggs can be cooked in the coals of a fire, or next to a fire. But you must do it correctly or you will have an egg explosion, not a deadly one but it could take out an eye. Practice with a chicken egg. All eggs have a fat end and a skinny end. Find the fat end. Make a small hole in the tip of the fat end then enlarge the hole to the size of a nickel, a quarter if a goose egg, half a penny if a quail egg. With a small pocket knife or a stick pierce the air membrane and the yoke. Nestle the egg, hole up, in coals near the fire. If using a chicken egg, turn it after five minutes, and cook for another 5 minutes. By then the white should be solid and the yoke semisolid like dough. Quail eggs take about two minutes per side, a goose egg 10 minutes per side.

Want a fried egg?  If you have a banana leaf you can arrange the leaf carefully near the coals and fry an egg on the leaf. It has just enough oil and toughness to do the job. (I should add there are two birds in the South Seas that are not eaten because they eat toxic bugs.)

Fish: While nearly every boy scout knows several ways to cook a fish over a fire little thought is given to flavor. The cleaned fish has a natural cavity to put items for seasoning. Among the items one can flavor a cooking fish with in the body cavity are plums, elderberries, bay leaves, blackberries, grapes, nuts, wild garlic, pepper grass, smartweed, sorrel, oxalic, sea purslane, seablite, sea mustard, gorse flowers, dandelion, hibiscus, violets, ramps, pepper grass roots, shepherd’s purse roots and others. (See “Clay” entry.)  Small fish can be wrapped in leaves and cooked on a low coals.

Gar and mullet can be cooked as is uncleaned directly on ashes, about 10 minutes a side for a foot long fish. When dons just pull off the skin. Do not eat Gar eggs. They are toxic to mammals.

Flat Rocks: While hot rocks are commonly used for pit cooking they can be used directly. Start a fire one several flat rocks. Let it burn down. Brush away the coals and cook your food directly on the flat rocks. This is good for small game and fish. You can also put a flat rock into the coals or prop a flat rock between two rocks with coals underneath. Grease the rock or your food will stick.

The ultimate flat rock is a polished slab of granite over a fire (or charcoal.)  You can hold it up with four bricks or the like. Remember to oil it before cooking.

Hot Rocks: Can be used to open difficult fruit or nuts. Take the rock to the nut, or the nut to the rock.

Insects: Some North American Indians would dig a pit in the middle of a field and build a fire in it. When it had reduce to coals they would fan out around the field and drive grasshoppers and crickets towards the pit. The insects would fall in the pit and get cooked. Once the fire had cooled the insects were eaten. In your backpack you can carry a piece of iron wire to skewer grasshoppers for roasting. Insects must be cooked thoroughly because they have parasites. See “Parching” entry. As for grasshoppers, eat those that are solid colors, such as all brown, all black, all green. Avoid multi-colored grasshoppers especially orange and black ones.

Large leaves: Several large leaves can be used to wrap food for cooking. Sometimes the leaves have to be wilted (burdock, water dock) other times the spine needs to be bent (bananas and Alligator Flag, read Thalia geniculata.) Other leaves, such as Paper Mulberry, can wrap small items. Indians in the southern United States cooked corn bread wrapped in the leaves of the Alligator Flag. Eggs can be fried on a banana leaf and many Asian cultures wrap food for steaming or roasting in banana leaves. The most common packaging via a banana leaf is pyramidal.

Meat: Any piece of meat weighing a few pounds can be easily roasted if you have a leather thong (or boot lace.) Using the thong (or strong string) suspend the meat beside the fire and twist the meat so when you let it go it spins. Depending upon the weight and materials used the chunk can spin back and fourth for 10 to 20 minutes. This assures even cooking.  The down side is that it needs nearly constant attending and rewinding. Also if you use string, you should wet the string occasionally to keep it from burning. Cooking time depends upon how close to the fire you suspend the meat and its size. A four-pound chicken a foot from the fire takes about four hours to cook thoroughly, or an hour a pound.  Smaller portions of meat can be put on a spit.

Another technique if using a hot stone pit is to wrap a hunk of meat in a simple flour and water dough. The dough cooks to a rock-hard consistency but holds in the meat juices and stays soft next to the meat. If you wrap the meat carefully and take it out with the dough seam on top the dough makes a perfect bowl.

Meat can also be placed directly on hot coals. The outside will get covered with ash and burn but the inside will be edible.

Nettles: Most members of the Urtica genus sting. Usually you collect them with gloves and then boil them. A different technique is to hold or suspend the entire plant near your fire or hot coals until it is very wilted. Remember to turn the plant in the process. The heat renders the chemical in the sting harmless and you can eat the plant raw.

Nuts: Make a bed of sand, bury the nuts in their shells in the sand, one to two inches depending upon the size of the nut. Build a small fire over the nuts. When the fire has died, dig up the nuts. This is particularly good with hazelnuts (filberts.)  Do not do this with acorns as they have tannic acid that must first be leached out.

Parching grain:  Put seeds in a basket or wooden bowl. Add a series of fire-hot rocks and stir around the bowl, cooking the seeds. When the rock cools remove and add another. Your nose will tell you when the grain is cooked. You might find it interesting that ancient man in Britain had a novel way of storing grain. He would dig a bell-shaped hole in the ground and fill it with grain. Then he plugged the top with a clay clump. The grain on the outside of the hole against the damp earth would germinate. The germinating grain would use up the oxygen in the hole leaving carbon dioxide. Without air the germinating grain died and formed a crust around the rest of the grain protecting it. Research shows the method works better than modern grain storage.

Some Insects, nuts and small tubers can also can be parched.

Pit baking: This technique works for a variety of food, just change the size of the pit, the materials and cooking time. When I was a boy we would often go out to an island at low tide, spend the day, usually over night, and then return on the next low tide. First we would dig a hole, line it with dry rocks, and start a fire in the pit. Then we would dig up clams, knock muscles of the rocks, and rummage around the seaweed for small crabs. When the fire had burned down we put seaweed in the pit, tossed in the shellfish, covered it with seaweed. After about an hour, or when we remembered, we would open the pit and have our feast. A matt or the like over the seaweed made things cook faster.

With large game you dig a larger hole, use more rocks, and build a larger fire. With large hunks of meat you must remove some of the rocks, put the meat in,  and put on rocks on top of the meat and then cover it all well. A grass mat helps hold the heat in. Give a leg of lamb three hours. Never use rocks from a stream. They can explode when heated.

Variation: After the rocks are hot, lay in the food and the rest around a stick placed vertically in the middle. Before closing pull the stick out, pour a couple of cups of water down the hole then cover the hole. Good for steaming vegetables.

A second pit method is to dig the pit, line it with stones if you have them, cover the food with leaves, cover that with three inches of dirt and then build a fire over the pit.

If you don’t have rocks you can use clay. Aboriginals dug pits about 4 feet long and 3 feet deep. They put firewood in the pit along with large lumps of clay.  After the fire burn down the lumps of hot clay were removed, the pit swept clean, lined with green leaves or grasses, then small game were put in, covered with green grass, weighted down with the hot clay, then everything buried again. Small game took and hour or so, larger game like small pigs or possums two hours or more.

Pumpkin cook pot: Think about. A pumpkin is hollow, has edible pulp and is a natural pot. Take off the top in a manner that allows you to put it back on like a lid. Scoop out the seeds for roasting. Put what you want to cook in the water proof hollow, replace the lid, put near the fire or in the coals. Watch closely. You can also put a spicy custard in the pumpkin for a seasonal treat. Actually nearly every edible squash member with a hard outer peel can be used this way.

Alternative method. Put a series of clean hot rocks in the pumpkin to cook the content, especially if it is a soup or stew.

Salt: Small amounts of salt water can be held on large leaves in the sun to evaporate leaving salt. Or along the shore several plants exude salt on their leaves or contain salt and can be used for salt flavoring, such as glasswort and seablight.

Sandspurs: These highly nutritious and calorie-dense grains are protected by painful spines. Harvest the plant by cutting it off near the ground. Use the stalk as a handle. Hold the seed heads over the fire or near the coals and burn off the spines. This also parches the seed. Once the spines are burned away consume the seeds right off the stem. The only caution is the seed has a lot of oil and burns easily so several passes into the fire is better than putting it in the fire and leaving it there. That usually ends up with it just catching on fire. (See my video.)

Seal blubber: Can be eaten raw or cooked.

Shellfish: Line saltwater shellfish up on a flat rock then rake coals over them. You can do the same with fresh water shellfish but they don’t taste as good and must be cooked very thoroughly because of dangerous parasites.  You can also “cook” small saltwater shellfish with citric acid using juice from wild oranges and the like.

Australian Aboriginals cooked saltwater shellfish quickly by putting them on coals next to the fire, foot up. When the frothed they were done. This also helps to avoid overcooking the shellfish and making them tough. They also consumed cockles (mollusks) by the tens of millions. They heaped them into a pile and built a small fire on the heap. That caused the shells to pop open eliminating the need to break them open.

Spit cooking: A spit is a usually green stick skewering small amounts of meats, vegetables. It is held over hot coals. You can hold the spit or prop it with two rocks, one over the end and one under it to regulate height. You can cut a forked branch to hold meat so you can rotate the meat easily. You can also split the spit and run small sticks through the split in the spit and the meat to hold it firm.

Reflector: Any material that can be used to reflect heat can make cooking go faster. A rock wall, piled stones, logs, all can reflect heat. Put the meat you are cooking between your fire and the reflector

Sugar: Young Bulrush (Scirpus) shoots can be harvested green. Dried then pounded and sieved the resulting white powder is sweet. Young peas can be used as a sugar substitute or as a fruit.

Turtles: Their shells make good cooking pots but boil water in them first to clean and disinfect. Skulls can be used likewise. Roast ungutted turtle on coals. When the shell splits they are done. Almost the entire turtle is edible except the lungs, gall bladder, skeleton, skull and nails. You really want to avoid the gall bladder and take steps not to rupture it.

Vegetables: Most roots vegetables can be baked next to a fire or in the coals of a fire. More so, with many root vegetables their peel protects them and dry heat intensifies the flavor. Depending upon the root it can be next to the fire, on the coals, or buried in the coals.

Yeast: Sources of wild yeast are grapes and elderberries. Each have a lot of yeast on their skins. This yeast can be used to make wine, beer, and raise bread.


{ 2 comments }

Brown Anoles


“Did you clean them” I asked a friend who might want to remain anonymous.

“No” he said.

“You cooked them whole?”

“Yes.”

“You ate them head, tail and all?” I asked.

“Yeph.”

“What did they taste like?”

“Bacon.”

Wow, I thought. That might be the to solution to the Cuban anole invasion: Eat them.

Deep Fried Brown Anoles

The Cuban Anole or Brown Anole, came to the United States via Key West around 1900. Now they are all over the place, in some locales up to 2,000 per acre. They are little bullies driving out the native Green Anole. To add to the confusion the Green Anole prefers to be green but can turn brown on occasion whereas the Cuban/Brown Anole is always brown, never green. The Cubans (Anolis sagrei) are slightly more dragonesque in appearance. Mature males usually sport a crest-like ridge running down the back whereas the natives greenies are slim and fine bone especially in the head. Further, the Brown Anole can voluntarily drop off its tail as a defense mechanism. It will partially grow back.

While the Brown Anole is crowding out the Green Anole some think the Green Anole is responding to the pressure by moving higher up in plants and trees leaving the Brown Anole to inhabit lower plant areas and the ground. Green Anoles like foliage where as the Brown likes to run along the ground.

Most of us have seen the Cuban Anole strutting his stuff, doing pushup and waving his throat dewlap, a bright pink to orange fold of skin. It’s to tell other fellows to stay away, this rake handle is my territory. And, if a lizard lass is looking for a mate he is saying, “I’m king on rake mountain.”

Actually lizards are the intellectuals of the reptile world, and anoles have different things to say. Their push ups and dewlap waves are not random. Among their messages are: Three head bobs, two dewlap waves, head up, then a series of small bobs. Another is one large bob, done slowly, a pause, two dewlap waves, then raise the head and do a series of small head bobs. Anole Morse Code. We may not know what it means, but they seem to understand quite well, and have for about 100 million years.

Green Anoles are becoming rare, don’t eat them

Anoles usually eat insects, and only live insects. The insect has to move for the anole to be interested in it… kind of like a dog chasing a car… Their native diet consists mainly of small arthropods, annelids, and mollusks. Cannibalistic, they are also short lived, 18 months on average, 36 occasionally. They are sexually active their second year. If you see a male displaying he will probably be dead that following winter season. Usually a male will keep two lady lizards happy and each will lay one or two egg a week, alternating ovaries.

Anoles can grow to eight inches though five is about as big as they get locally (one advantage of occasional frost perhaps.) They are found in warm areas of North America up to about the latitude of central Georgia, Central America, South America, and in Hawaii. Whether they are in Taiwan and Guam is a bit of a debate. Usual weight is six to eight grams (males) or four to an ounce. Females half that. They do not make good pets and when capturing them they will bite but they can only hang on and it does not hurt.  In fact, kids in Florida often catch them and let them latch onto their earlobes and wear them as living earrings. However, as all reptiles can carry salmonella, wash your hands and ear lobs after handling.  Clearly they are not to be eaten raw.

You can capture them by hand (particularly after dark) or take them from your cat.  As for cooking, you can freeze them first or drop them in hot oil, and or both. Add a little pepper and bon appetit.

{ 99 comments }

Earthworms, an important part of the native diet

Cooking with Earthworms

The cartoon strip BC once had its peg-leg poet write: “The bravest man I ever saw was the first one to eat an oyster raw.”

While that may be true, I can still remember the first time I saw anyone eat an earthworm. I told the story before in my article about checkerberries. I wrote: “He was a neighbor’s son named Gary Vickerson. I was about to start high school, around 1965, and Gary was less than half my age. He lived about a half mile to the northeast, over a small woody hill and across a short field. His mother knew my mother and there was a worn path between our houses. It was near a spot where checkerberries grew. I think his older brother Randy and sister Susan were there as well. We were looking for berries when Gary found an earthworm. Without announcement he just ate it, dirt and all, then laughed about it. No threats. No bribe. No “dare ya.” He just ate it. I can still remember the rich loam on his teeth. Oddly, he was the only one in that family of six who turned out all right.”

If you read any archaeological research on American natives you learn quite quickly that they dried and stored earthworms for winter use, some smoked them (though earthworms are not native to North America.) Usually the worms were either put in water so they would offload gut dirt or they were fed other stuff to get rid of the dirt and make them tastier.  (They also dried or fermented fish eggs, but that’s another article.)

As it turns out Gary was lucky in that the worm he chomped down came from a healthy field. One can get some nasty diseases from eating earthworms raw. It’s not the earthworm per se but fetid stuff in the soil they live in, such as back yards that pets use for a bathroom. There is such a case in the medical literature from 2004.

A sixteen-year old girl took ill almost exactly a month after eating an earthworm on a dare, from a back yard. Doctors diagnosed her with a case of dog roundworm, something that is usually found only in toddlers, who routinely eat dirt. Usually asymptomatic, in this case it caused the girl breathing problems. Thus a word to the wise about collecting, handling and cooking earthworms.  Backyard, playgrounds and public parks are not as clean as one might think.

Many of the same arguments that can be made about eating insects can be made about earthworms, except the arguments are even stronger (though personally I don’t view worms as food to save the planet, or insects. They are one more facet to add to a forager’s knowledge.)

In the earthworms’ favor — gastronomically speaking — is the fact nothing is thrown away. A 204 gram sample grams has 708 calories, are some 70% protein, 11% fat, up to 21% carbohydrates. Potassium is 1820 mg, phosphorus 1590 mg, calcium 444 mg, sodium 965 mg, chloride 910 mg, iron 50.4 mg, zinc 17.7 mg, copper 1.5 mg, iodine 0.38 mg, and selenium 0.40 mg.  Additionally, eating them reduces cholesterol as their main oil is Omega 3 fatty acid, you know, the same stuff found in fatty fish. The earthy flavor of the worms blends well with certain dishes and spices… think cumin and curry. The positive list does not stop there.

Earthworms are consumed in their entirety, no bones, viscera or waste involved. And there can be up to 1.75 million of them per acre. You may not know how to hunt, trap or fish, but you certainly know how to dig.  And while they can be dug up easily in many places, it is also efficient to pick them up off the ground after a heavy rain. You can even be green about it and have an earthworm farm feeding them vegetable table scraps. That also makes it easy when you want some bait to go fishing, or getting a green date: “Would you like to come over and see my earthworm farm?”

If you buy worms from other than bait shops they will come packed in peat moss. They also will have spend at least a day in shipping so they have also purged themselves. Thus they are ready for use after a little washing. If you go the bait store route and or raise your own you can do a couple of things to purge them. Put them in water for a few hours — they won’t die — or let them eat moist cornmeal for a day or more. Out with the old, in with the new.

Either way, earthworms should be kept cool, under 60F if possible, and moist. Prior to cooking examine a handful of worms. Get rid of any dead ones (make sure they are dead, though more specifically make sure they are alive.) Then rinse them in cold water. Pat dry. They are now ready for cooking or freezing for later use. A cup of worms weighs about 8 ounces, or two cups to a pound.

So, how to cook them? Usually the worms are boiled first before used any other way. This is a bit subjective but the point is to eliminate the mucus in them, much as one does with slugs and some snails (those crawlers are also fed for 10 days before use to assure they are non-toxic.)  Some boil them once for ten minutes, some boil them five times in five changes of water for 10 minutes each. Some boil the three times for three minutes each. Others boil them twice for 15 minutes. Some don’t boil them at all. You have to find your own level of gastronomic satisfaction. Boil until they are mucus free, meaning the water remains clear. Once boiled they are ready for other uses. You can roast them, fry them, chop them, or dehydrate them. You can even grind the dry ones into a powder to be added to flour or the like. To dry put boiled earthworms on a baking sheet and cook at 325 F for 15 minutes. Others think just letting them eat other food for a day or two takes the place of boiling, as does one recipe below.

Beside Native Americans the Aboriginals in Australia ate earthworms as did the Maoris of New Zealand, and some people in China.  The common earthworm’s scientific name is Lumbrius terrestris. (LEM-brick-es ter-REST-triss.) In this case the name means what we call it. Lumbrius means worm and terrestris means earth.

Lastly, before we get to the recipes, a word about table presentation. When we eat beef, the entire carcass is not placed on the table before us. We often go to great lengths to make this or that cut appetizing, edible, and attractive yet we tend to think of worms (and insects) in toto rather than in recipes, invoking the Yuck Factor. Most of us ate pork, beef or lamb for years before seeing one roasted whole on a spit, which if that had been our first experience with that meat we might have thought of it as yucky, too. Start exotic fare as part of a recipe first, then work your way up.

One more little fact: The experts tell us earthworms are not native to North America. They came with the Europeans thus Native American uses would be latter day rather than pre-Columbian.

EARTHWORM SAUTE by Christopher Nyerges, Urban Wilderness: A Guidebook to Resourceful City Living, 1979

1 cup earthworms

1/2 large onion, chopped

1/2 cup water

1 bouillon cube

1 cup yogurt or sour cream

3 tablespoons butter

1/2 cup mushrooms

Flour for coating

Wash earthworms thoroughly and place in boiling water for three minutes. Pour off water and repeat the boiling process twice. Bake on cookie sheet at 350 degrees F. for 15 minutes. Roll the worms in flour, brown in butter, add salt to taste. Add bouillon and simmer for 30 minutes. Saute onions and mushrooms in butter. Add onions and mushrooms to the worms. Stir in sour cream or yogurt. Serve over rice or noodles.

DEEP FRIED EARTHWORMS

Chop a sweet apple fine then put in with worms for a day. Chill worms. Roll in flour with paprika, salt and pepper. Deep fry until crisp.

ASIAN EARTHWORMS

After soaking worms, steam them with onions, garlic, broccoli. Pour over them a sauce of butter and soy sauce. Noodles or rice is optional.

EARTHWORM PATTIES (By Matthew Stewart, The Incredible Edible Wild)

1 1/2 lbs. ground earthworms (Place live worms in damp cornmeal for 24 hours to purify, boil for 10 minutes, then grind. Yes, they are used wet)

1/2 cup butter, melted

1 teaspoon lemon rind, grated

11/2 teaspoons salt

1/2 teaspoon white pepper

1 egg, beaten

1 cup dry bread crumbs

2 tablespoons butter

1 cup sour cream

Combine earthworms, melted butter, lemon rind, salt, and pepper. Stir in soda water. Shape into patties and dip in beaten egg, then in bread crumbs. Place in heated butter and cook for 10 minutes, turning once. Place patties on hot serving dish. Serve with heated sour cream on top.

EARTHWORM MEATLOAF, from the Worm Book by Nancarrow and Taylor, 1998.

1 1/2 pounds ground meat

1/2 cup boiled worms, chopped finely

1 onion soup mix

1/2 cup evaporated milk

1/2 bell pepper, chopped

1 slice fresh bread, shredded

Mix all ingredients together and place in a loaf pan. Bake for 1 hour at 400°F.

CARAMEL WORM BROWNIES

1 pack of Brownie mix (or your own homemade recipe)

2 Tbsp worm flour

1 cup chopped nuts

1/4 cup bottled caramel sauce

Combine the brownie mix with the worm flour and prepare according to package directions. Stir in the nuts.

Pour 1/2 to 2/3 of the batter into a baking dish. Drizzle the caramel sauce on top of the batter. Pour the

remaining batter on top of the caramel sauce. Bake according to package directions.


And lastly, a first-prize willing recipe created in 1976 by Patricia Howell of West St. Paul, Minnesota. She entered the earthworm annual recipe contest sponsored by the North American Bait Farms.

EARTHWORM APPLESAUCE SURPRISE CAKE

Mix together the fllowing: 1/2 butter, 1 1/2 cups sugar, 3 eggs (well beaten) 2 cups of sifted flour, 1 tsp backng soda,  1 tsp cinnamon, 1/2 tsp each of salt, nutmeg,  ground cloves; 1 1/2 cups applesauce, 1 cup of earthworms dried and 1/2 cup cup chopped nuts. Pour mixture into a greased baking pan and bake fo 50 minutes at 350F. remove, cool and serve.


{ 22 comments }


Eels: Lunch, Slip Sliding Away…

I can remember the first time I caught an eel. It was in the Royal River in Pownal Maine, using an earthworm on the bottom. Though perhaps only 10 miles from the sea as the crow flies the eel had followed the river inland for some 40 miles. But that’s what eels do.

I was a latchkey kid — probably why I spent so much time in the woods alone — and my mother was not at all happy to see 12-year-old me lugging home an eel. While her mother prized eels my mother did not. She said even when dead they wiggled when being cooked in the frying pan. No problem. I was already cooking for myself because my mother was a horrible cook. (I tell people she thought I was a Greek god. Every meal was either a burn offering or a sacrifice.) The eel I cooked tasted great.

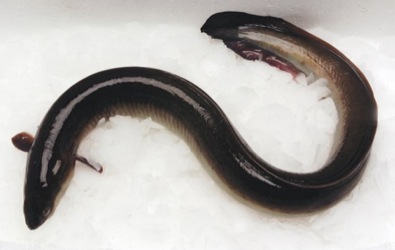
In a word, eels are fish,usually brown, green, olive or black, with a light or yellow stomach. There are five species in cooler waters, ten in warm waters, one in Europe. While they live in fresh water, on shallow bottoms, after a set number of years (8 for males, 13 for females, 25 if landlocked) their yellow belly turns silver and they swim to the deep Sargasso Sea between Bermuda and Puerto Rico.  There they spawn and each female eel can produce as many as 10 million baby eels. The resulting little eels drift for a year upon the currents then select a fresh water area to live, from eastern North America to the rivers of western Europe. Thus my first eel had traveled several thousand miles. They’ve also been eaten around the world in nearly every country.

Eels live on the bottom and are are scavengers, like crabs and lobsters. Perhaps that contributes to their distinctive taste. They also eat small fish and mollusks. They are high in omega 3 fatty acids as well as vitamins A, B1, B2, D and E. Eels are about 71 percent water, 17% protein and 11 percent fat.

Catching eels depends on the time of year. The best time is when they head downriver to the sea to spawn. They are at maximum size and health then. And since they don’t all go every year there is always a migration. Eels usually travel at night in late summer and early autumn. In warm months they will take a baited hook. In the winter they can hibernate on the river or lake bottom often in great numbers (when they are taken by spears.) Young eels can be taken by baited hooks or traps.  Here in Florida eels can live in canals, particularly in the southern end of the state.

Most commonly folks fish in estuaries from around 7 p.m. on using chicken liver, blood worms, squid strips even smelly old beef for bait.  Eels prefer dead food. Cast about every two minutes into coves and shallower water where it runs in to deeper areas of the river. A fire on shore helps to attract them. A smaller hook works better than a larger hook. In turn you can use them for bait for larger fish, such as striped bass.  Wait for a tug on the line, wait  for a second tug then set the hook. I caught mine on a tiny gold hook intended for pan fish. And since the eel swallow the hook there was no possible compromise. My mother still complains about that first eel. After that she just gave up.

Once you have an eel you can dispatch it like other fish (they are slippier) or take it home and put it in deep container and toss in a cup of salt or so. Oddly that will kill them in a couple of hours and clean some of the slime away.  Commercially eels are dispatched by putting them in a tank and stunning them with electricity. Eels must be thoroughly cleaned especially on the outside. All traces of slime must be removed. This can include scraping the skin. When gutting an eel (if you are not using the skin to cook it in) cut from just behind the head to the very end of its tail. Incidentally, eel skin is very tough and has been used to make door hinges.

To smoke cleaned eels, soak them in brine for 10 minutes (or more.) To make the brine use nine to 10 ounces of salt to a quart of water. Drain. Smoke at  95F /30C for one hour, the one hour at 120F/40C and finish with one hour at  170F/77C.

To can the same eels soak them in brine for 15 minutes. Then follow the same drying procedure. Afterwards pack them into a can, cover with a vegetable oil heated to 230F/110C and seal and heat process at 230F/110C. A seven ounce can takes one hour.

If you want to know how old the eels is it will tell you. Eels (and perch) have a bone under the gill cover. Remove it and count the rings. Just like a tree, one ring for each year alive. Oh, if you catch a Moray eel in tropical waters don’t eat it. It is best to consider it toxic to humans.

Eel Stifle

2 pounds peeled potatoes sliced thin

6 onions also peeled and sliced thin

2 pounds of eel cut into 3-inch pieces, or so

2 cups milk

1/4 pound salt pork diced

Flour

Salt

Pepper

Butter or oil a casserole large enough to hold everything. Put a third of the potatoes and onions on the bottom. Sprinkle with some flour, salt and pepper. Add a layer of eel, using half of them. Repeat the layer this time also adding half of the salt pork. Put the remaining potatoes and onions on top, sprinkle with the remaining salt pork. Add the milk. Cook in a preheated oven at 350F for an hour or so until tender. Should serve six, or one teenager.

 Grilled Eel

2 pounds of eel

About a third of a cup of olive oil

Paprika, a pinch or two, or half a teaspoon

Sage, about 10 fresh leave chopped or less dried

Salt Pepper

Mix the seasoning with the oil. Let set for about 10 minutes. Meanwhile cut the eel in to three inch pieces. Wipe dry. Set the eel in the mix. Salt and pepper to taste. Heat broiler or  start grill. Put eel on oven proof pan (four inches under broiler) or on grill. Cook 10 minutes. Turn pieces. Baste with mixture.  Cook ten more minutes or until done (light golden brown.)

Jellied Eel

* 2 eels, cleaned, gutted and skinned (about two pounds)

* ¾ pint water

* 5 tbsp white wine vinegar

* 10 black peppercorns

* 1 bay leaf

* Salt

* Knob of butter

Chop the eels into pieces a couple of inches big

Grease a casserole dish with the butter

Put the eel pieces in the dish with the rest of the ingredients and season with the salt

Put the lid on the casserole dish and bake in the oven on gas mark 3, 170 c, 325 F for about an hour

Let the eel and its liquor cool before putting in the fridge over night until the liquid has ‘jellied’

 Stewed Eel

* 2 eels, cleaned, gutted and skinned

* 1 pt fish stock

* 1 oz butter

* 2 tbsp milk

* 1 tbsp plain flour

* Salt and pepper

Chop the eels into 2 inch pieces

Melt the butter in a saucepan then add the flour, stir well and cook for a minute

Slowly add the stock and bring to the boil, stirring all the time

Add the pieces of eel and simmer for about an hour

Add the milk and salt and pepper to taste

Serve immediately with the sauce on the side

ENGLISH EEL PIE

Skin, clean, and cut up two large eels. Cook with one tablespoon of butter, half a cup of chopped mushrooms, a tablespoon of chopped parsley, a minced onion, a bay leaf, salt, pepper, the rind of a lemon, a wine glass of Sherry, and a cup of beef stock. Cook until the eels are tender, strain the sauce, and thicken with butter and flour. Line a baking dish with pastry, put the eels in it, and pour the sauce over, with sliced hard boiled eggs on top. Cover with pastry, brush with yolk of egg, and bake for an hour in a moderate oven. Serve either hot or cold.

EELS À LA LONDON

Fry four chopped onions in butter, dredge with flour, and cook thoroughly. Add two cups of stock, half a cup of Port wine, two bay leaves, and salt and pepper to season. Cook until thick, stirring constantly. Add one large cleaned eel, cut into two-inch lengths, cover, and cook for fifteen minutes. Serve on toast.

Achilles’ Eel

2       tb          Olive oil

2       lb          Eel cut into 3 inch pieces

1/2     lb          Onions — roughly chopped

3                    Sun-dried tomatoes (in oil) roughly chopped and soaked in

2       tb          Boiling water or

1       tb          Tomato paste instead

3/4    lb          Tomatoes, skinned, seeded and chopped

1/2    ts          Honey

1       tb          Fresh thyme or

1/2    ts          Greek “Mountain” thyme

1                    Bay leaf crumbled

1                    Zest of one lemon

1       tb         Lemon juice

2                   Garlic cloves, minced

1       cup       Finely chopped flat-leaf parsley

1       tb          Finely chopped fresh mint

1/2    lb          Feta cheese, crumbled

Salt to taste

Freshly ground black pepper to taste

In a heavy skillet or wide flameproof casserole, heat  2 tablespoons olive oil and saute the eel pieces until are well-browned on all sides.  Remove from the pan and add another tablespoon oil if necessary. Add the onions and fry gently until translucent. Pound the sun-dried tomatoes, if using, to a paste. Add to the pan with the chopped tomatoes, honey, thyme, bay leaf, lemon zest, and garlic and simmer for 10-12 minutes until the sauce begins to thicken. Return the eel pieces to the sauce and stir in the parsley, mint, and salt and pepper to taste.  Move to a baking dish or earthenware casserole, if necessary. Strew with the crumbled feta and shake the dish, so the cheese settles a little.  Sprinkle with lemon juice. Bake in an oven preheated to 350F for about 30 minutes.


{ 2 comments }


Chicken and Ostrich eggs

  Eggs for Survival and Food

Eggs would seem like a simple foraging topic and it is, and it is not. My copy of the U.S Department of the Army Field Manual on Survival doesn’t mention eggs. Think about that. It tells you how to dangeroulsy test a leaf for edibility yet does not cover the topic of eggs. Of the dozen or so survival manuals I have only two lists eggs: Ray Mear’s Outdoor Survival Handbook and Survival in the Outdoors by Byron Dalrymple.

Perhaps I chose the wrong books to put in my personal library or maybe survival writers just don’t think much about eggs but they should. Not only are eggs nearly the perfect food but they have been on the menu for as long as man has been eating. And there are more than just bird eggs. There are reptile and fish eggs, the latter a very common part of the Native Americn diet. (I think we will leave snail eggs for bait. Look for clusters of white or pink pearls on the stems of water plants above the water line.)

Nearly all bird eggs are edible, and at any state of incubation. I say nearly because there are two poisonous birds, the Hooded Pitohui and the Ifrita kowaldi, both of Papua, New Guinea. Whether their eggs are edible is unanswered. The toxin is in the birds’ skin and feathers. If I may digress a minute.

One of two toxic birds

Pitohui (Pitohui dichrous, left) is orange and black. That is an extremely common coloration for toxic creatures. Numerous non-edible insects are colored orange and black as are some reptiles. It is not a coincidence that warning road signs are orange and black. It is a “danger” coloration that has been with us for a long time. Recognize it.

The Hooded Pitohui’s poison is homobatrachotoxin. It comes from its diet of Choresine beetles. I is a prime example why you can’t use animals as an indicator of what humans can eat. Birds can eat arsenic, squirrels strychnine, deer poison ivy.  The beetles are  the probable source of the deadly batrachotoxins found in Poison Dart Frogs. Technically that poison is a steroidal alkaloid neurtoxin, a sodium-channel blocker. It stops a cell from pumping sodium around preventing it from letting nerve signals go through.  Gram for gram one of the most powerful natural toxin known.

Local natives called the Pitohui the “rubbish” bird. If driven by hunger to eat the bird they rub the meat first with charcoal. Pitohuis raised in captivity are not toxic. The second toxic bird in New Guinea, Ifrita kowaldi, is known locally as the “bitter bird” and gets it toxin from the same beetles. It’s clearly a case of you are what you eat. The lubber grasshopper is not fatally toxic to large mammals but it can make you sick.

So, all bird eggs are edible (except perhaps those of the wild Pitoui and Ifrita.) They are edible at any stage of development, and in some cultures incubated duck eggs are a delicacy called balut. They are not cooked but eaten raw, developing feathers, entrails and all. Duck eggs, incidentally, are preferred by some for cake baking because they have a large yoke and add intensify the yellow color. They are, however, more rubbery than chicken eggs particularly when you fry them and wild duck eggs can be “gamey”.

Among the common fowl eggs eaten are chicken, ostrich, ducks, goose, quail, turkey, peacock, pheasant, plover,  partridge, emu, pelican and gull eggs. Most wild bird eggs are protected so if you are going to consume them make sure it is an emergency, limit your witnesses, eat the evidence. Don’t forget that if you butcher a chicken or an iguana or the like there will be unlaid eggs in various stages of development in the creature. My great grandmother, May Eudora Dillingham, was particularly fond of unlaid hens’ eggs.  When you take them from the hen they are soft shelled, pliable and decrease in size, but they are all edible as is.

Roasting an egg with an open fire is neither difficult nor easy. It’s in between. I’ll describe how to do it with a chicken eggs since that is what most people will have to train with. Eggs have two ends, one is fatter and one is skinnier. With your knife gently tap a small hole in the top of the fat end. Widen that hole to about the size of a nickel. With a small stick or the like pierce the air membrane and yoke (this is to prevent the egg from exploding, and it will if especially if you don’t open the end of the egg and pierce the yolk.)

Next nestle your egg open end up in some coals near the fire. Sometimes the content will expand, sometimes it will not. A large chicken egg takes about 10 minutes to cook this way. After five minutes rotate the egg 180 degrees so the cold side is now next to the fire.  In about 10 minutes your egg will be done… read the white will be cooked, a bit rubbery, and the yoke will be cooked but not hard like a hard boiled egg, but not flowing either. A goose egg takes about 20 minutes, same treatment. Quail eggs can cook in four minutes, two minutes each side. It takes some experience and judgment.

So, next time you have an outdoor fire, even a barbeque, practice cooking eggs the mesolithic way but remember to open and pierce the yoke or it will explode loudly and throw egg and shell everywhere… On the other hand, if you want to put loud surprises in the campfire of the enemy…. Eggs can also explode in the microwave. A little known fact: If you have eggs and tomatoes to eat you can get all nutrition and calories you need to stay healthy. Remember that the next time you are on some deserted desert isle.

Turtle eggs

Now what about reptile eggs? We have to be more exclusive with reptile eggs. Eggs laid in water or a jell are not worth the effort which excludes frogs and toads (though they might be bait.)  Turtle eggs are prime eats, sea or fresh water, and a favorite of one of my grand uncles, Arthur Blake (eldest son of Mae E. Dillingham mentioned above) who also had a prodigious appetite. He could eat 18 eggs at a sitting, and was never fat. Again, remember many turtles, particularly sea turtles, are protected and the fines for a turtle egg omelet are high and usually include jail time.

Iguana eggs are edible as are alligator eggs but remember mother alligators are very protective of their eggs and young (I know this from first hand experience. If you want to know more details, email me.)  Snake eggs are edible but know dad and mom King cobra protect their nest.  Burmese Python eggs are about twice the size of chicken eggs and like many reptiles have leathery shells rather than fragile ones. The problem with snake eggs are they are often difficult to find as they are in logs, under rocks and otherwise buried, though I recently found some on a bank while hiking in a swamp.

There is a report out of India in March 2010 of some boys being sickened by eating snake eggs, and one dying. However, what the one boy died of and whether they had snake eggs at all is contested. Given the sanitary conditions of the area and the age of the boys, what they ate and what caused their illness is rather unknown. If it were snake eggs it would have not only been unusual but rather singular. There have been no follow ups on the report.

Cavier from different species

Next on the list is fish eggs, called roe or when prepared a particular way, caviar. Commonly consumed fish eggs are Cod. Hake, Herring, Mullet, Salmon, Shaker, Shad, Steelhead, Striped Bass, and Sturgeon, the latter perhaps the most famous fish eggs of all. Fish eggs were a significant part of the diet of many Native Americans. That said, the eggs of the freshwater fish, Gar, are toxic to humans as are the eggs of the salt water fish Cabezon. Skip those two. Fish eggs can be fried, boiled, baked, brined or dried. As for preservation there are two or three common methods. One is drying, one is making caviar, and the last is fermenting, which is really not fermenting but controlled rotting. Drying is accomplished many ways but usually sun and salt are involved, or at least a dehydrator and salt. A good example is Bottarga which is salted, cured small fish eggs (salmon eggs do not make good Bottarga.) It is often ground and used as a seasoning on seafood and pasta dishes. It tastes a bit fishy but not in an offensive way, and quite salty. It is an excellent way to preserve an excess of fish eggs and will last for about a year. Besides using small fish eggs the roe should be “ripe” which means you can see the eggs in the sac they are in. They are also uniform in color and not too watery.

Drying fish eggs

To make Bottarga soak the roe skeins in saltwater overnight. Lay out paper towels on a board or the like and pat the roe dry. Put the skeins in a bowl and coat lightly with olive oil. Transfer them one skein at a time to a bowl of coarse salt and coat with salt. Put the salted skeins on new dry paper towels so they are not touching. Put the roe in a cool, dry place. You don’t have to refrigerate them. The salt will draw out the moisture so you will have to keep replacing the paper towels and re-salting the skeins. They must always have a coat of salt on them. Somewhere between two to seven days the roe will be cured. At this stage they are soft and cannot be ground up. You can let them sit for weeks or months and at the latter stages they will be dry enough to grind. Ground roe is considered prime pasta flavoring, like grated cheese on topPut finished roe in a sealed plastic bag or a glass jar in the frig or the freezer. It will keep for about a year. Don’t grind some until you want to use it.

To make caviar use small fish eggs that are less than a day old. An oily aroma is natural but reject any eggs that smell of spoilage. Gently remove the eggs from their skein and put in a bowl. You’ll get about 1.5 cups of eggs from a half-pound skein. Remove any pieces of membrane, blood, and bits of intestine or skin.

Snake eggs, note the oblong shape

For each 1.5 or so cups of cleaned eggs, make a brine from one-half-cup of salt and 2 cups cold water. Put the eggs into the brine, mix, and let set for at least 30 minutes (so the eggs can absorb the brine.) Strain the caviar, rinse in cold water, drain. Store in tightly covered jars in the frig. It can remain good for several weeks, or as long as the flavor is good. Served chilled. Discard if you detect spoilage. The same eggs can be processed into bait as well. To make non-edible bait the skeins are cut into bait-size pieces along natural divides and dusted with borax. Dry in a cool area for one to two days. Then seal and store in the frig or freezer. THEY ARE NOT EDIBLE as borax is not good for us. The bait is wrapped in a small piece of nylon (stocking) or the like and then put on the hook. The eggs then “milk,” that is, when in water they release an odor other fish like.

Fermenting eggs is not what it sounds like. Called by American natives as “stinky eggs” it is rotting them to a particular flavor stage. The same is done with beaver tail, seal flippers, fish heads et cetera. The problem is ancient methods worked well but modern materials do not so there have sporadic cases of botulism when tradition methods and materials were not used.  To quote the Public Health Agency of Canada from 2001:

“Harvested salmon roe is placed in a grass-lined shallow dug-out in the ground. The dug-outs are usually in shaded areas to keep the eggs cool. Roe is covered with grass or moss, and left to ferment for a few days. Time for fermentation varies with ambient temperature conditions. The fermented roe is stored at room temperature and consumed within a few days.

Salmon heads, beaver tails, and seal flippers are some of the traditional food items that are similarly fermented by various Aboriginal groups in Canada. The extent of consumption practices for these food items within a community, and between communities, is difficult to ascertain. On the West Coast, these delicacy items are generally felt to be more popular among Elders than the younger generation.

Traditional foods are now prepared using non traditional materials such as plastic containers or glass jars. Fish, or meat, to be fermented is stored in closed containers at room temperatures. Presence of an anaerobic environment, heat and moisture increase the probability that any Clostridium botulinum spores will germinate, grow and produce the toxin. “

If you are going to try “fermenting” fish eggs please do more research on it and use the old method.  (Some natives would put fish heads on a string and leave them in a flowing stream for a few weeks to “ferment” them.)

The word “egg” didn’t start out spelled that way. It was “oeg” and competed with “ey” plural “eyren.” By 1500 in English both words were used and it caused some confusion. When the Pilgrims landed at Plymouth rock in 1620 you could have fried eyrens or oegs. “Egg” prevailed by the late 1600s and omelets haven’t been the same since. Here’s a recipe for deviled eggs from 25 BC Rome (“deviled” means spicy. See a separate article for  fish sauce.)

“Make a small hole in each egg to let out the air, which might break the egg during boiling. Put the eggs into cold water. Bring to the boil and cook for about 5 minutes, then leave to cool. Peel the eggs and cut them in half. For 5 eggs, finely crush 1 clove of garlic with some pepper and 5 anchovies. Add the egg yolks and pound smooth. Add a little olive oil and a little wine and stir well. Pile the mixture into the egg whites.”

Here’s some salmon egg curing method’s from Mark’s daily Apple.

•    Fill a large bowl with warm (around 100 ºF) water and a generous amount of salt. You’re basically creating a brine.
•    Place the roe in the water and let it sit there for half an hour.
•    After half an hour, rinse the roe in warm water and carefully remove the skeins (the sacs holding the eggs together).
•    Once all the skeins have been removed, including the bits, place the eggs back in the brine for a few minutes.
•    Strain out the brine. Shake the colander to get the eggs as dry as possible, then place into sterilized canning jars. The roe will be good for a couple weeks in the fridge and longer in the freezer.
Here’s a basic soy-sauce cure:
•    Run the roe under warm water, about as hot as you can handle, to help you remove the skeins. Do this over a colander to prevent any lost roe.
•    Once all the skein has been removed, place the rinsed and cleaned roe into a glass container.
•    Add soy sauce and any other seasonings (sake and mirin are popular) and stir until all eggs are evenly coated. Cover the container and place in the fridge.
Enjoy for the next few days. Freeze what you don’t eat. A vacuum sealer will get you the most air-tight seal, but you’ll want to pre-freeze the roe to keep them from being crushed. If you don’t have a sealer, you can just stick them in a good ziplock bag and suck the air out with your mouth, then put that ziplock into another ziplock freezer bag (suck the air out of that one, too).

What if you have a seasonal glut of chicken eggs which can happen on the farm. Take the eggs –unwahsed, that’s very important DO NOT WASH THEM — and put the eggs whole in Lime Water. (That’s one tablespoon of slaked lime per quart of water, also called CAL, aka calcium hydroxide,use to nixtamalize corn, easy to buy in Mexican markets called CAL) I have four dozen eggs store that way now. They can stay good for one or two years that way. 

{ 13 comments }